

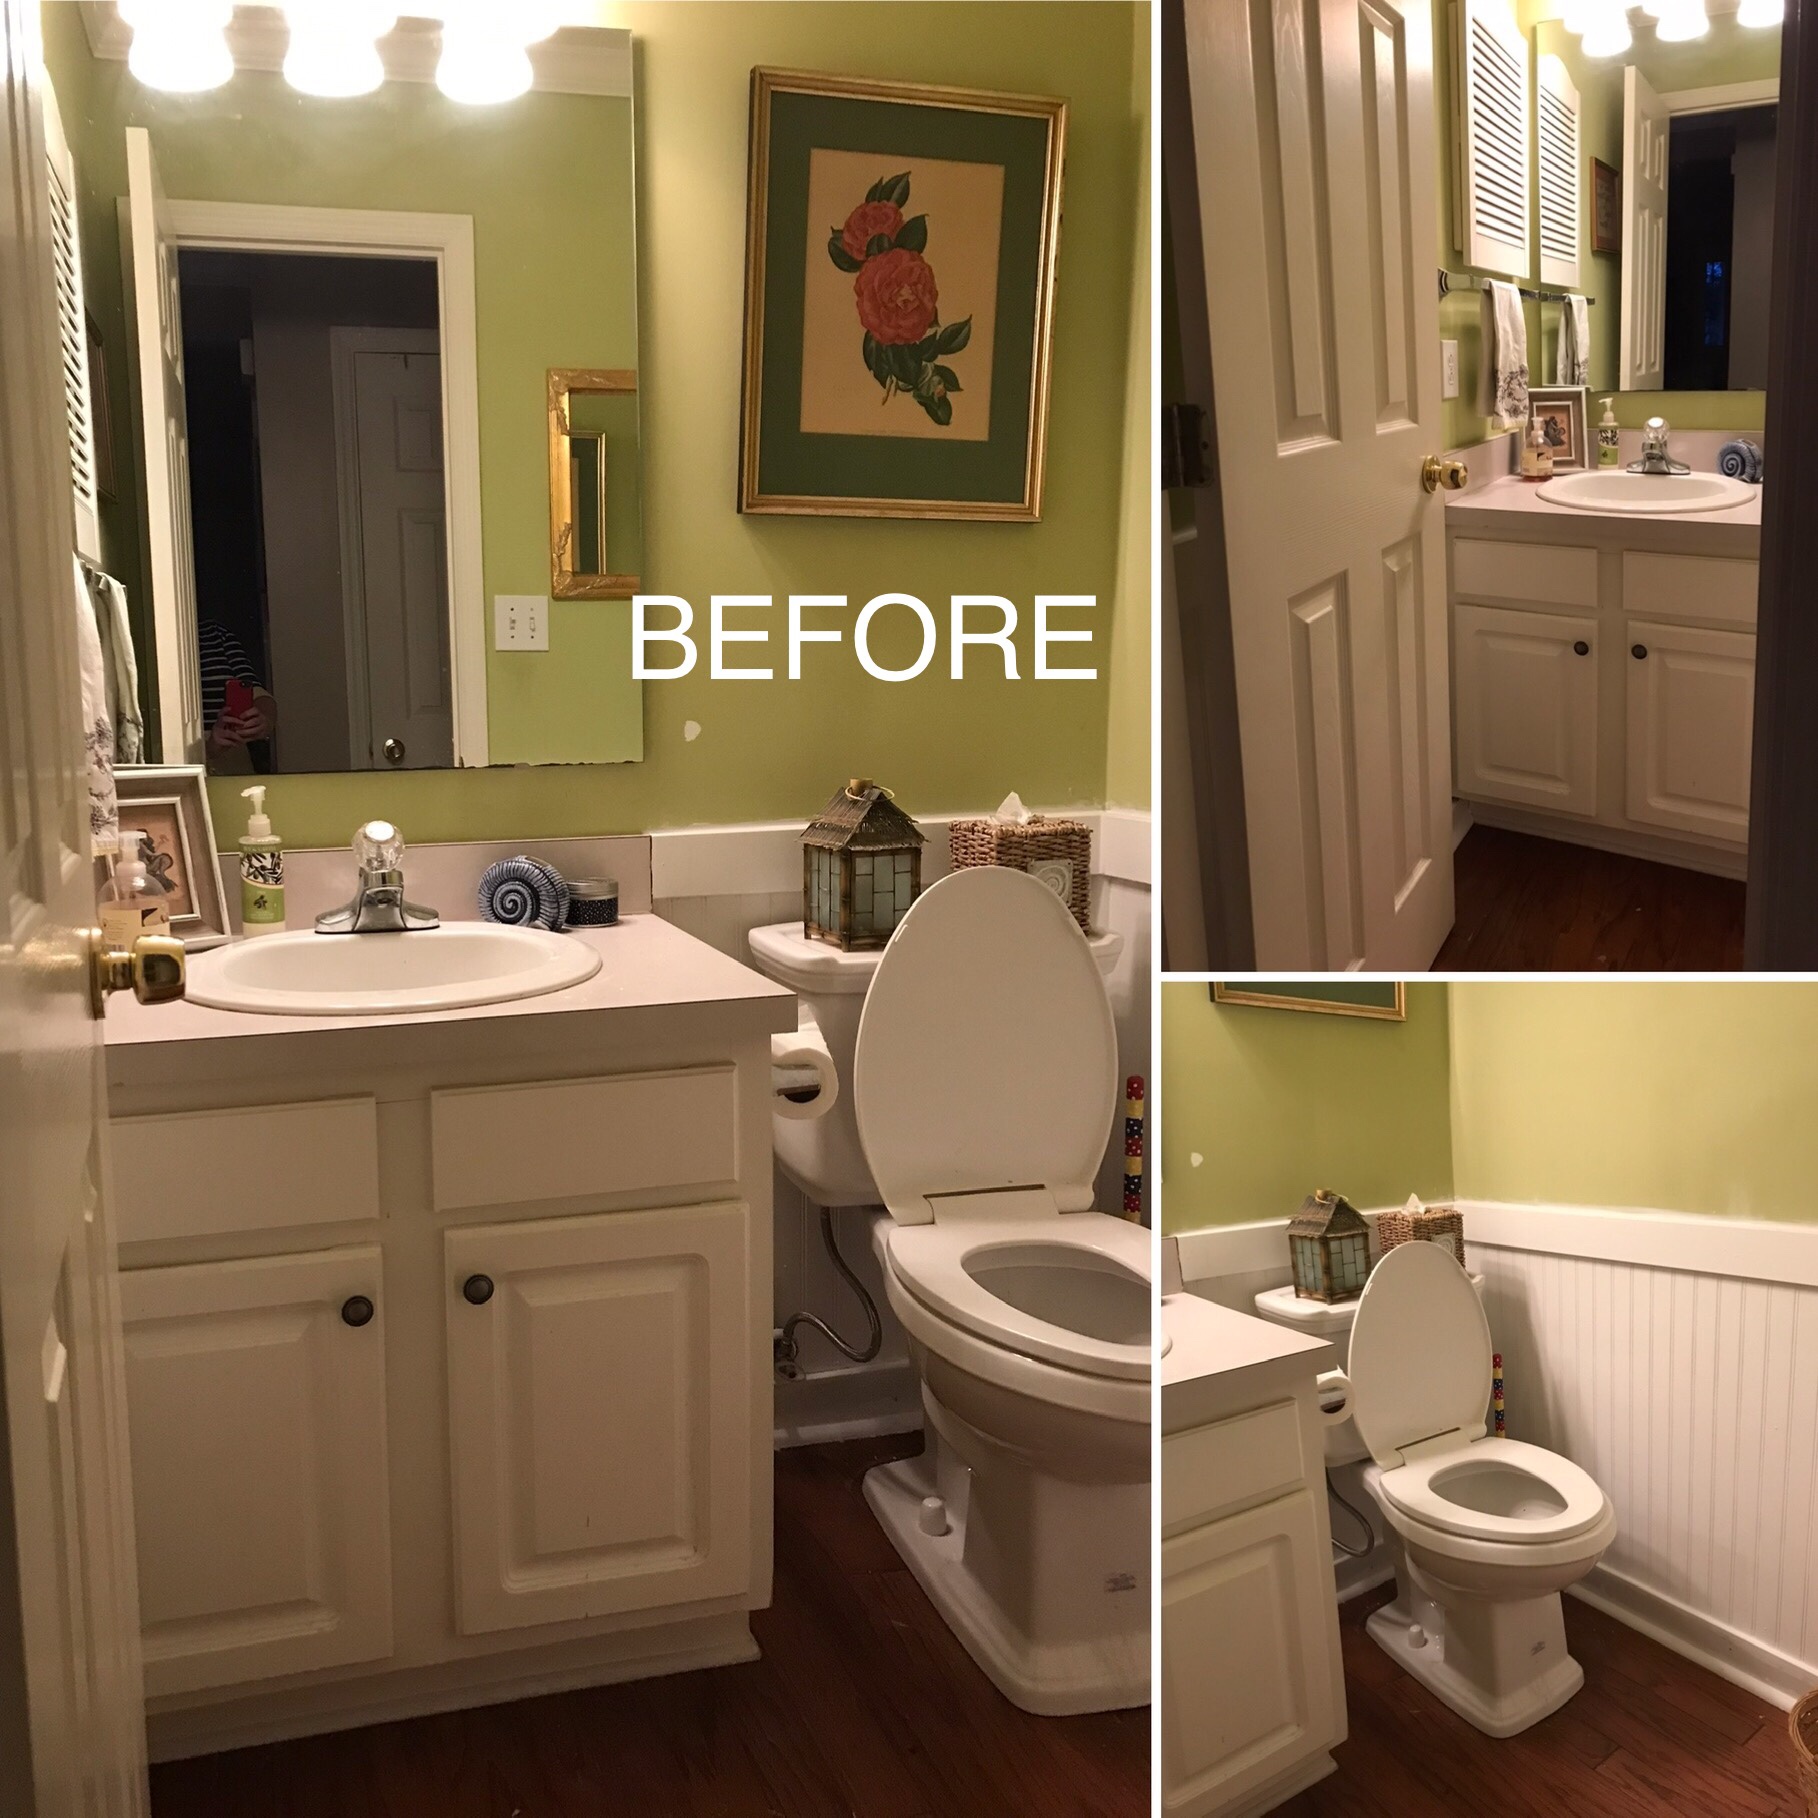
Recently, my husband installed beautiful white bead board in our almost 30-year-old home’s half bath. The pristine clean lines of the bead board seemed to emphasize the bathroom’s dated imperfections. The multitude of other needed updates stuck out like a sore thumb.
I’ve wanted to do a bathroom remodel for sometime, but if you are like us, you live on a tight budget and timeline.
So I put my #DIY on a budget thinking cap on— and devised a plan.
When perusing pages of magazines and #Pinterest http://www.pinterest.com ideas, the rooms that always seem to pop out to me are ones with a light and airy space— whitewashed walls with vibrant artwork and unique accent pieces.
Our home already has a beachy feel to it as I was raised on the coast and spent my twenties living the beach life in a popular coastal town in my native North Carolina.
It was only natural I would choose to move our older, traditional style bathroom to a more modern, coastal feel.
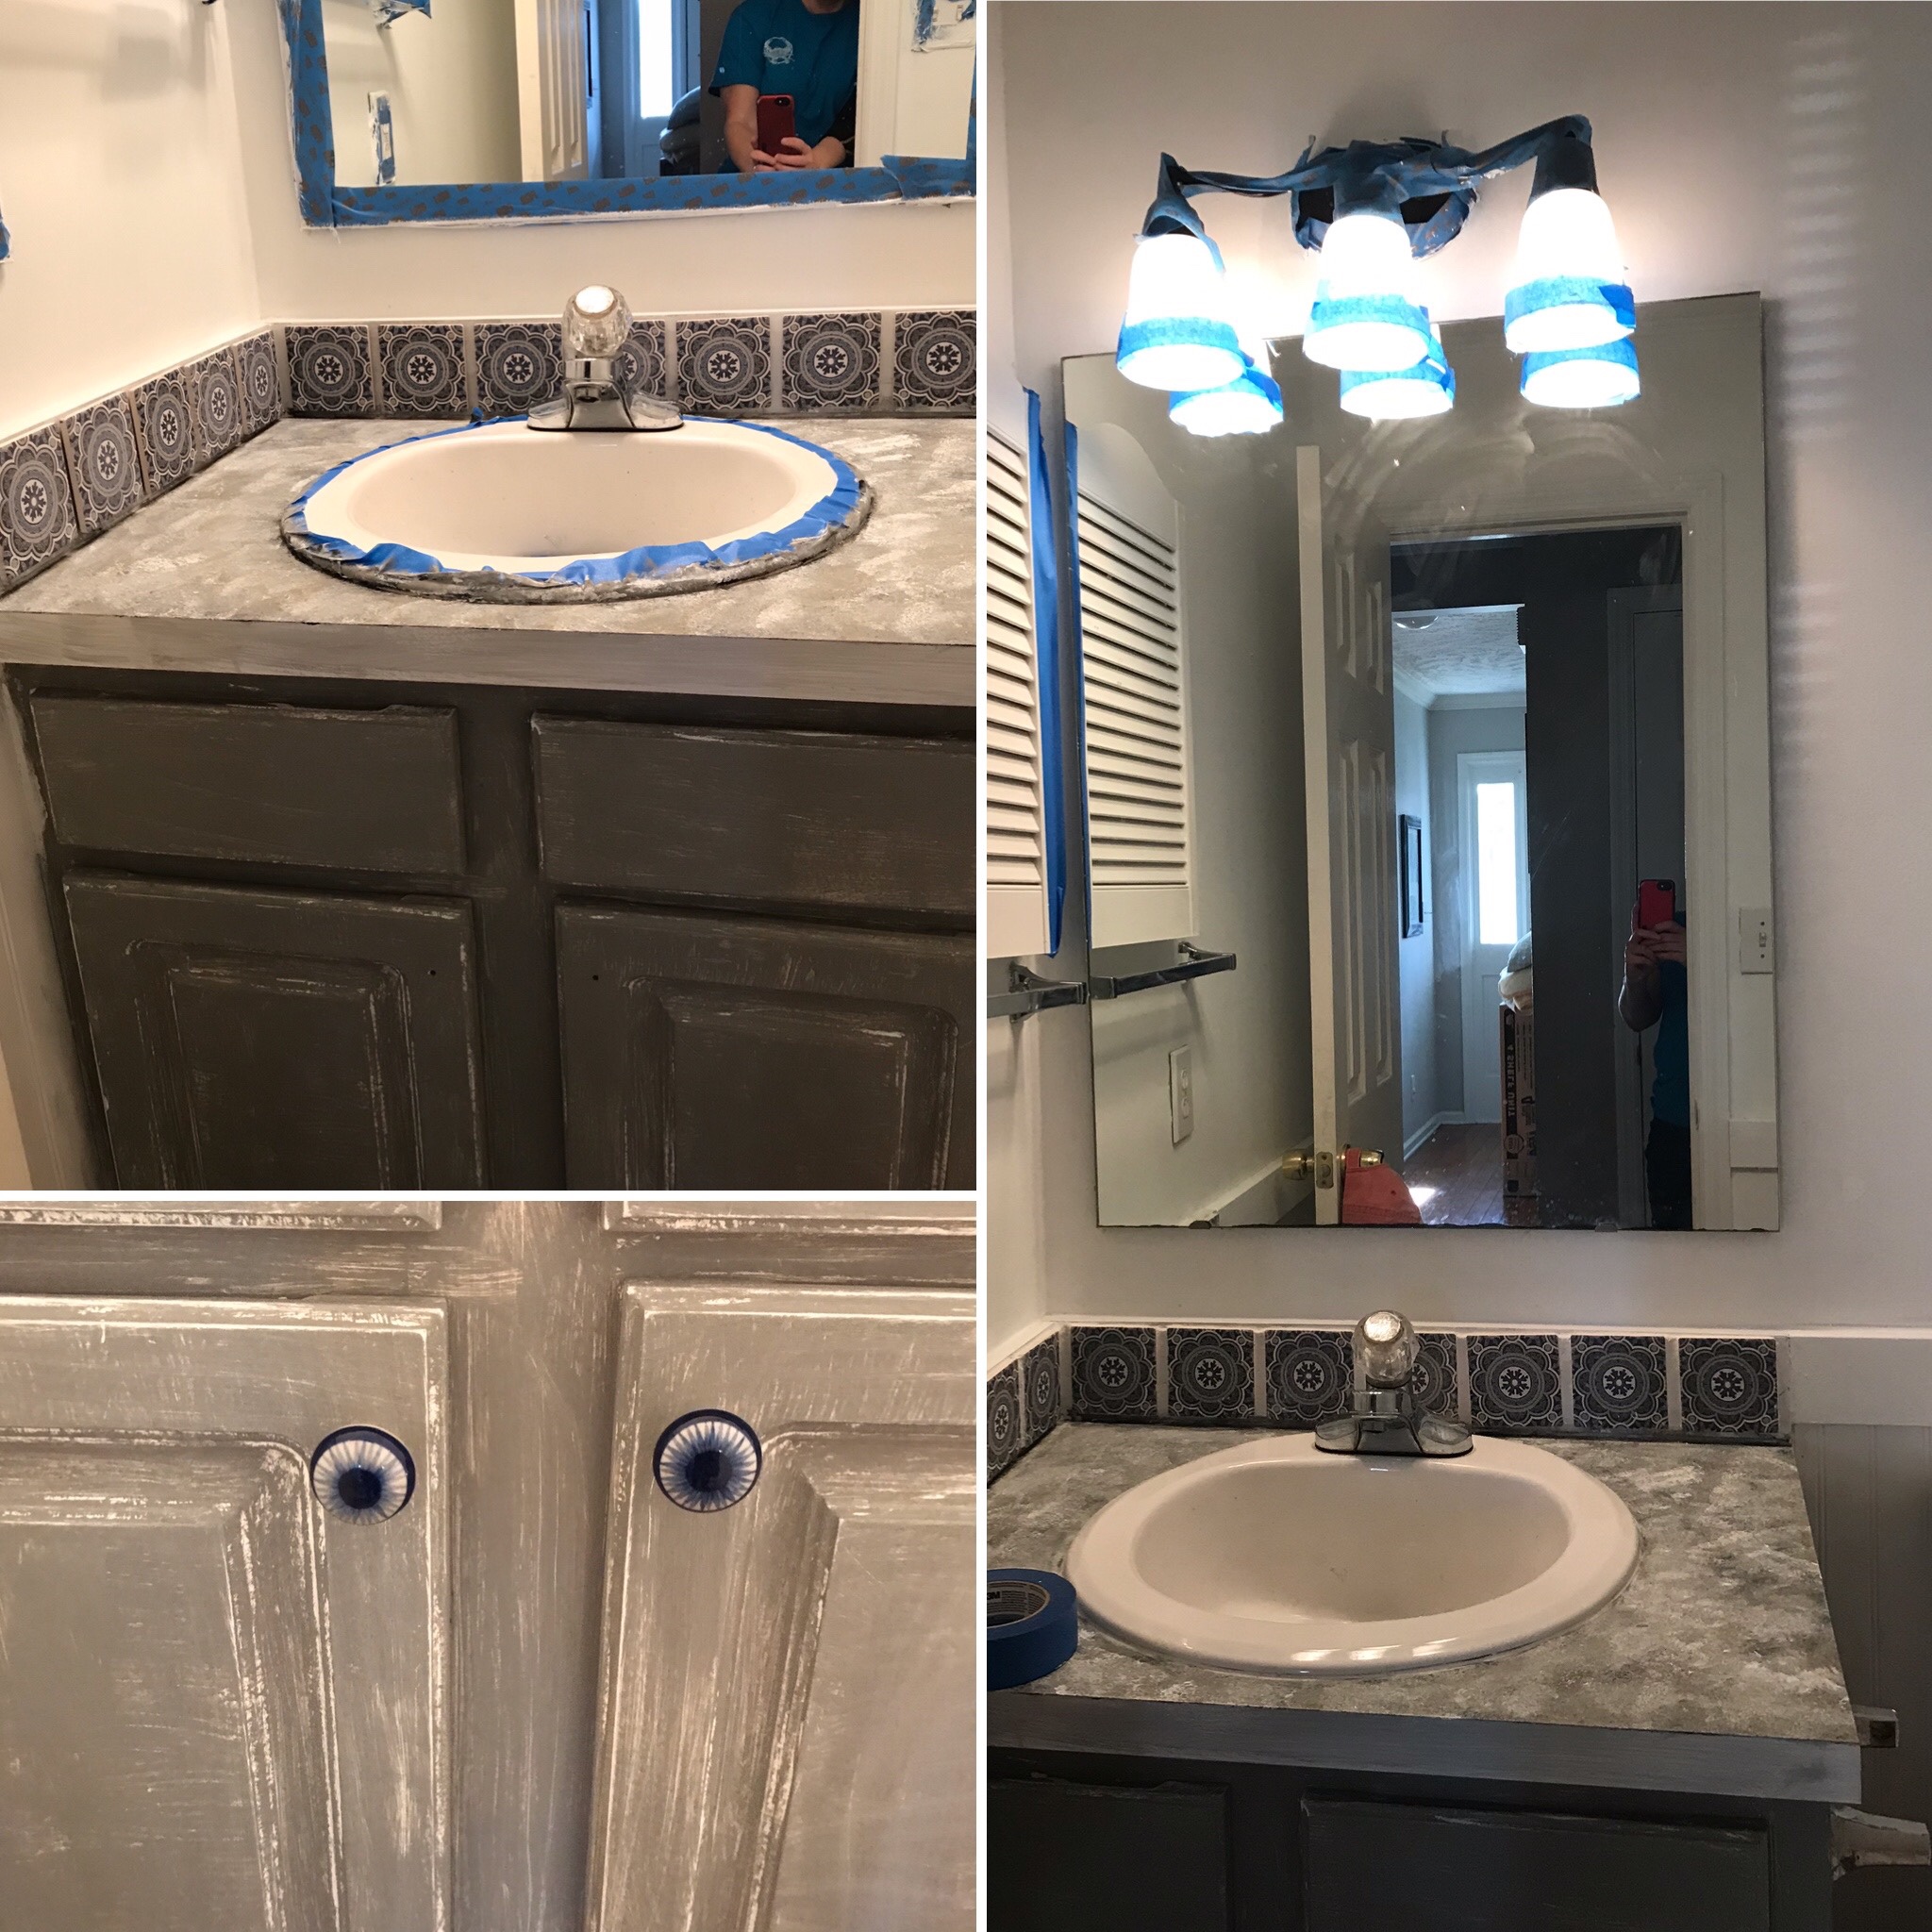
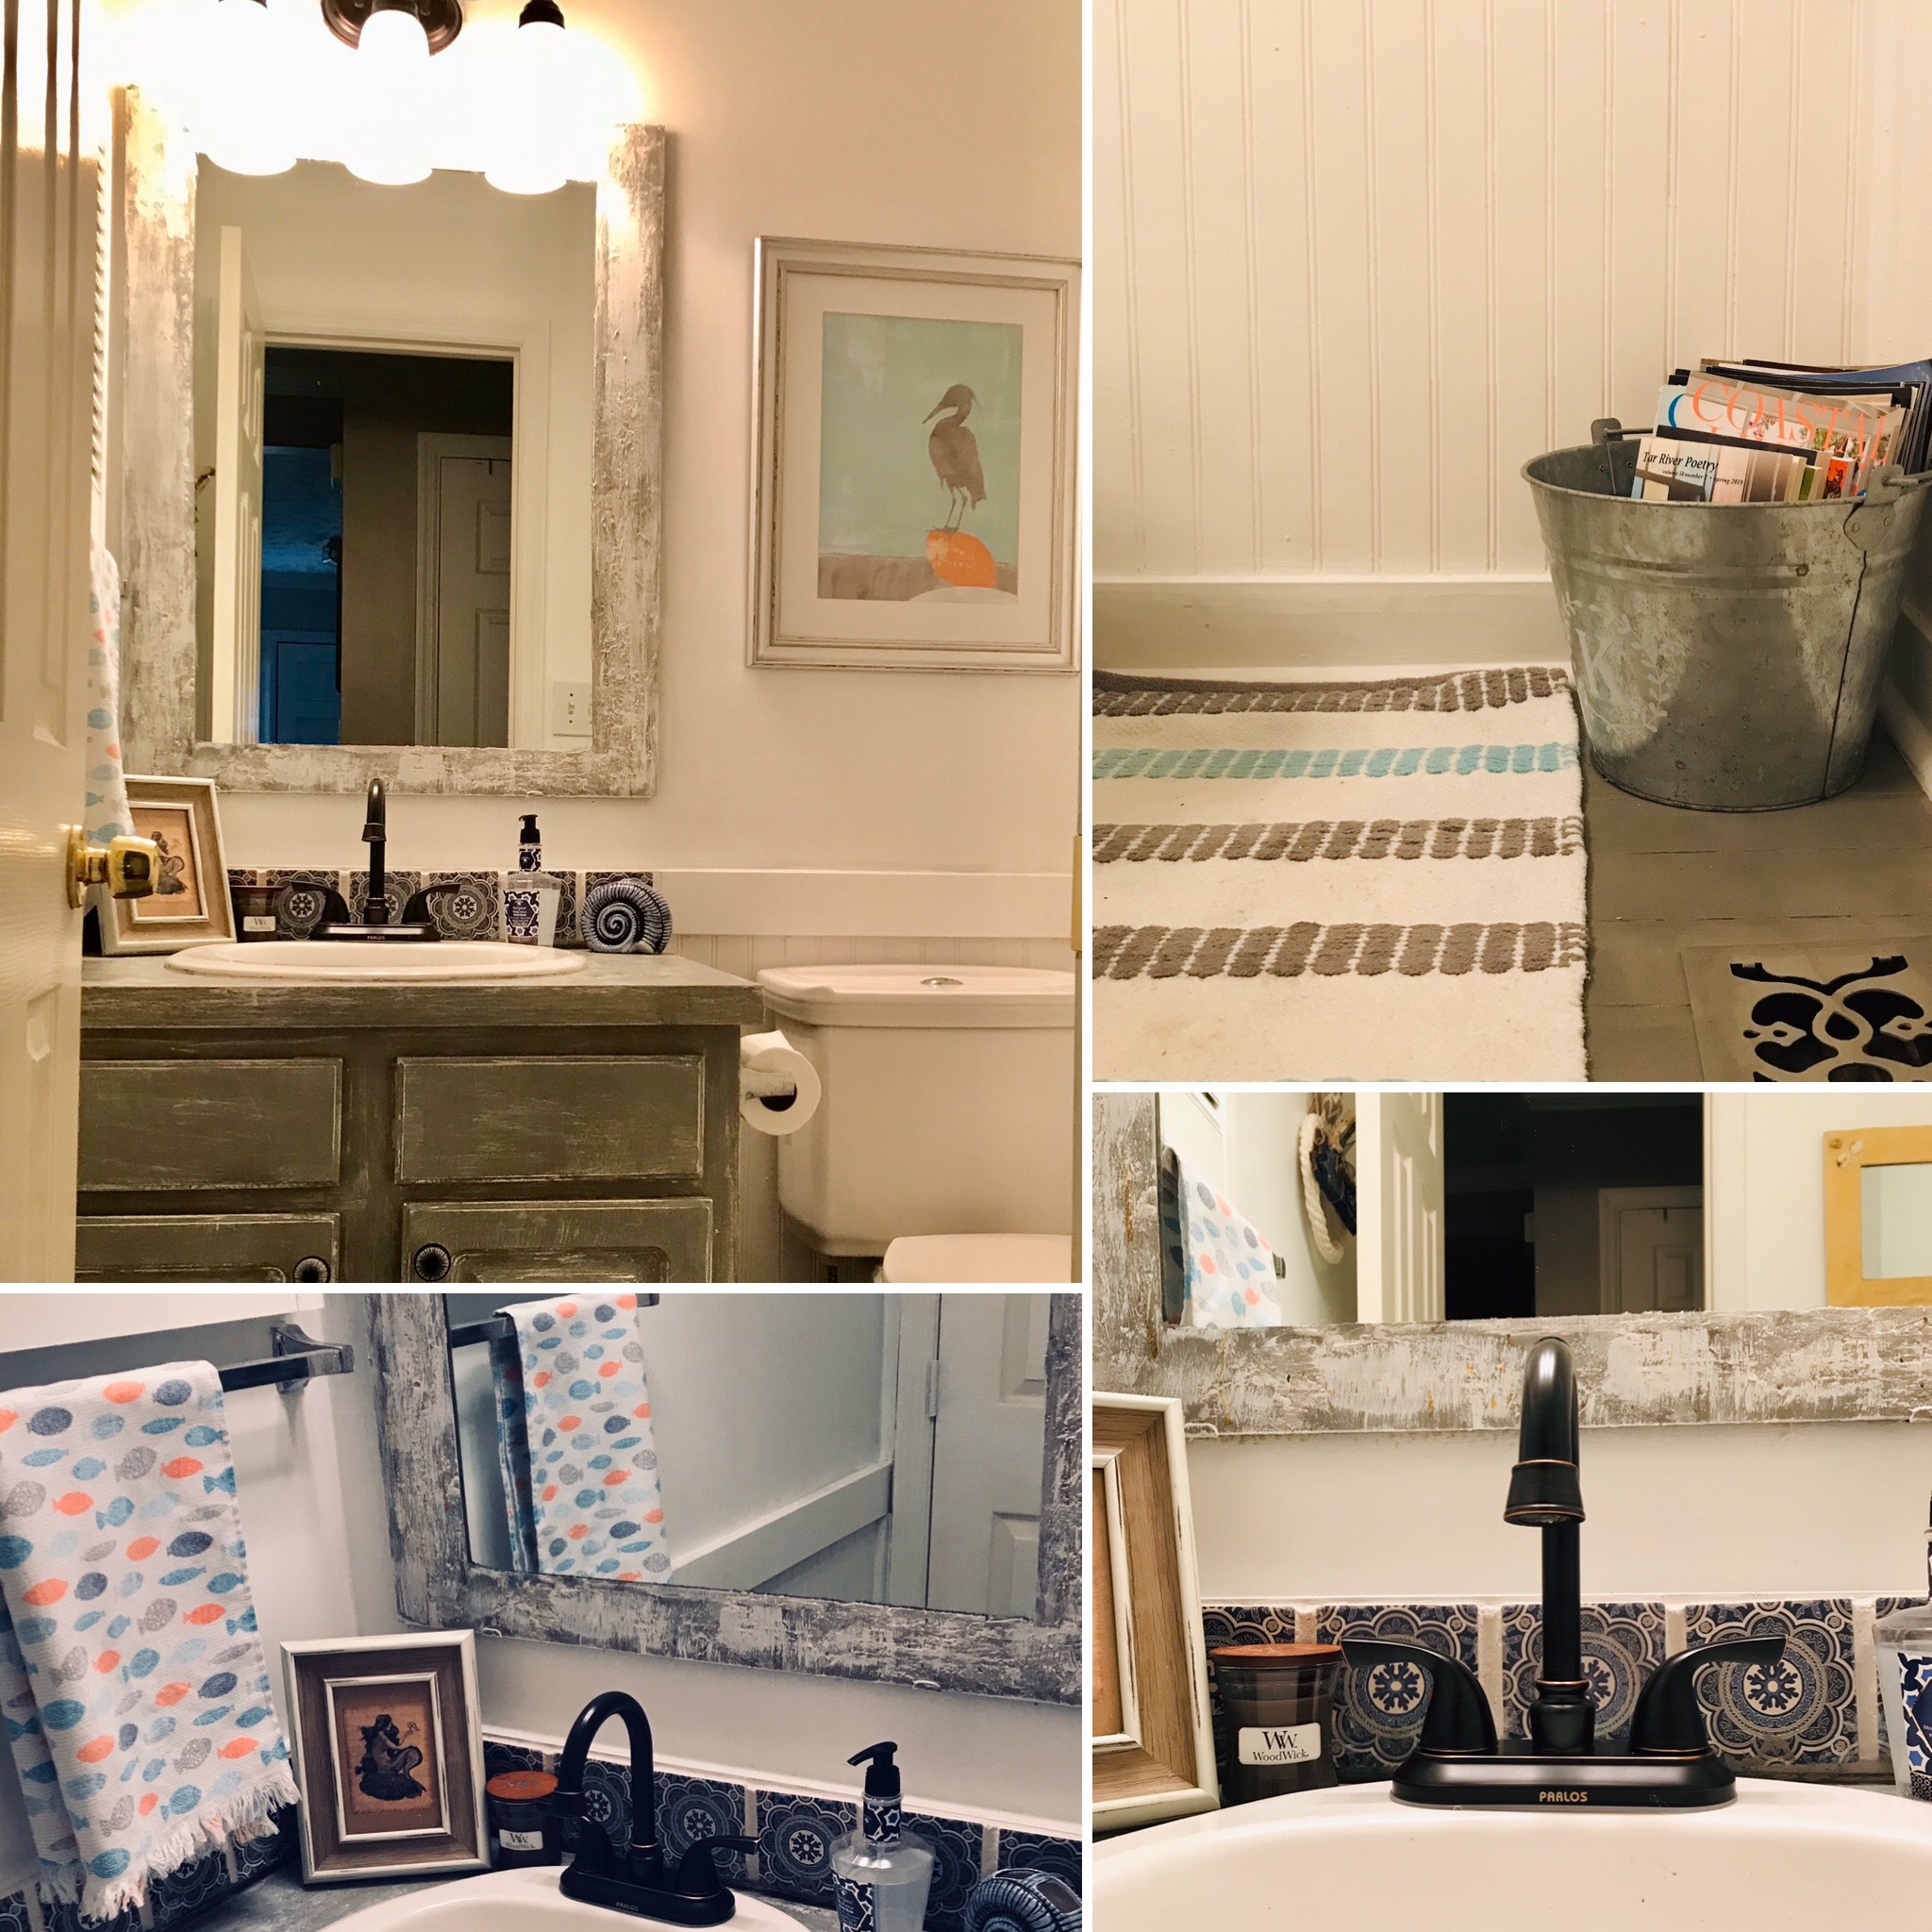
I decided in order to make the small bathroom feel lighter and more open I would paint the palm green walls a bright white to match the bead board. We had a nearly full gallon of white paint on hand so it would not cost any additional money for this update. Just a bit of elbow grease.

I was tired of the older dark wood floors and wanted to make them pop. I purchased a can of Rust-Oleum gray chalk paint off #Amazon http://www.amazon.com months before to use on some furniture refurbish projects I had in mind. I felt it would be the perfect color for a #cottage-style update for the flooring as well as the bathroom vanity.

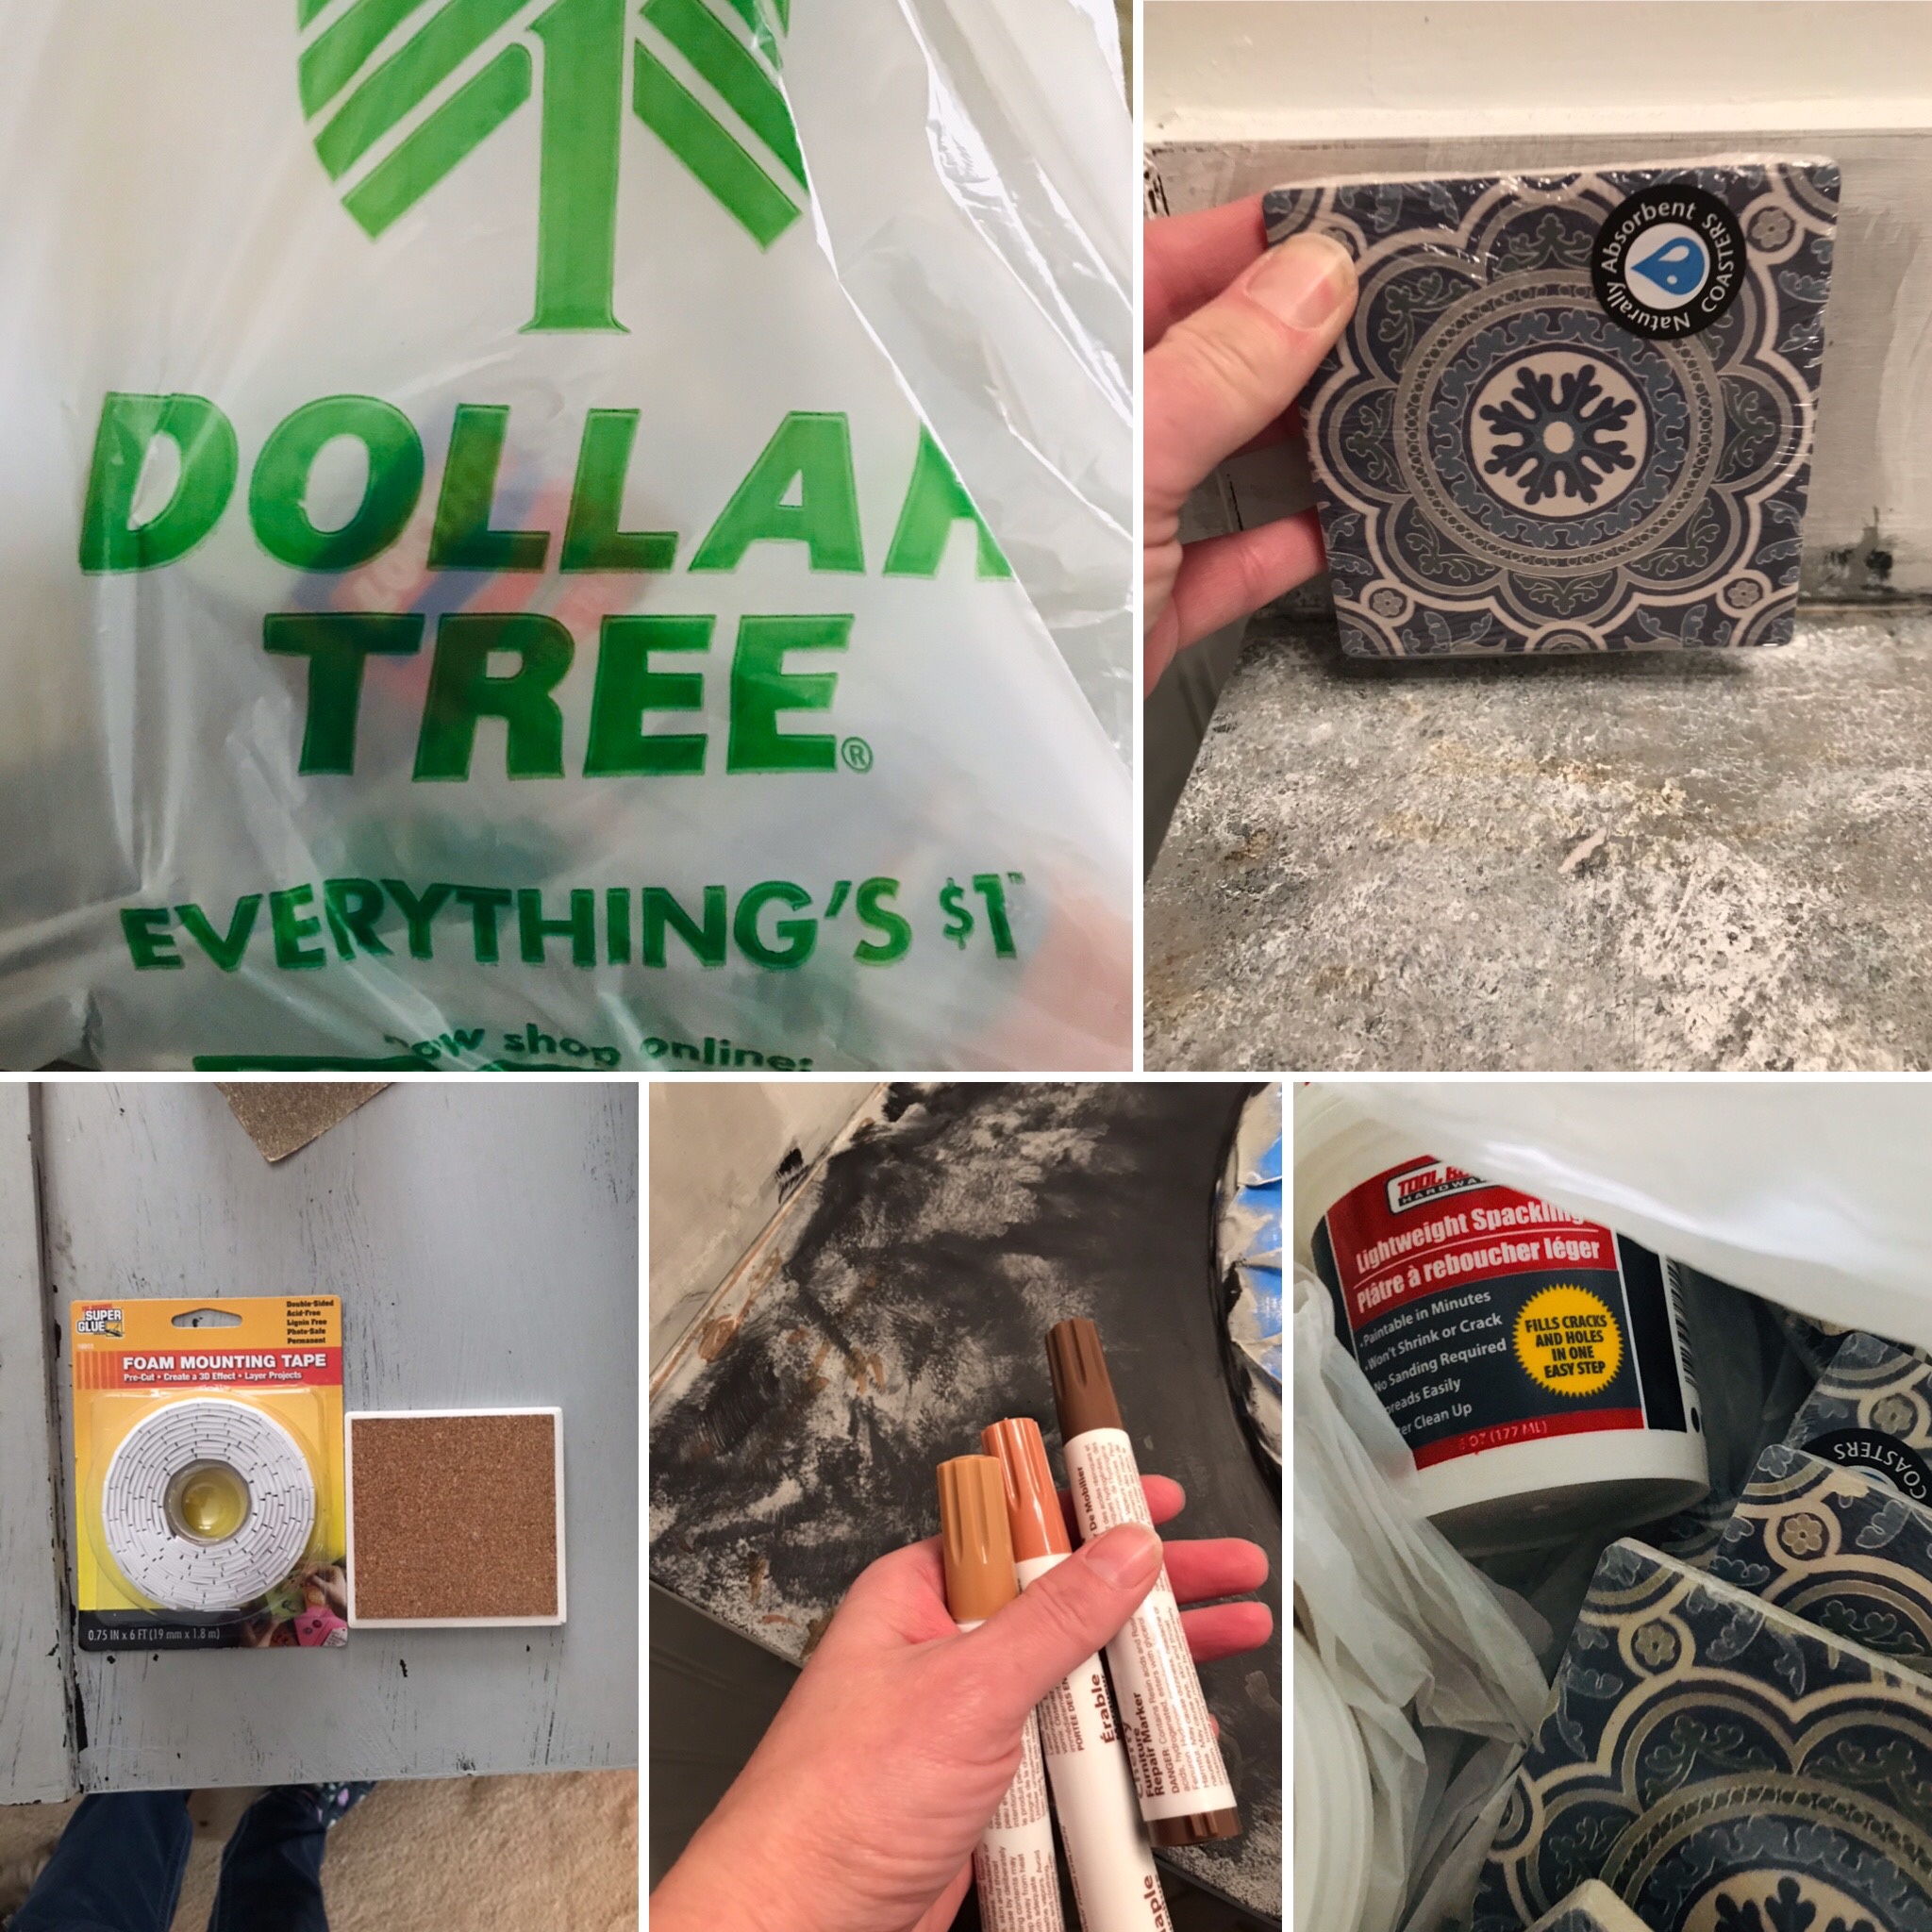
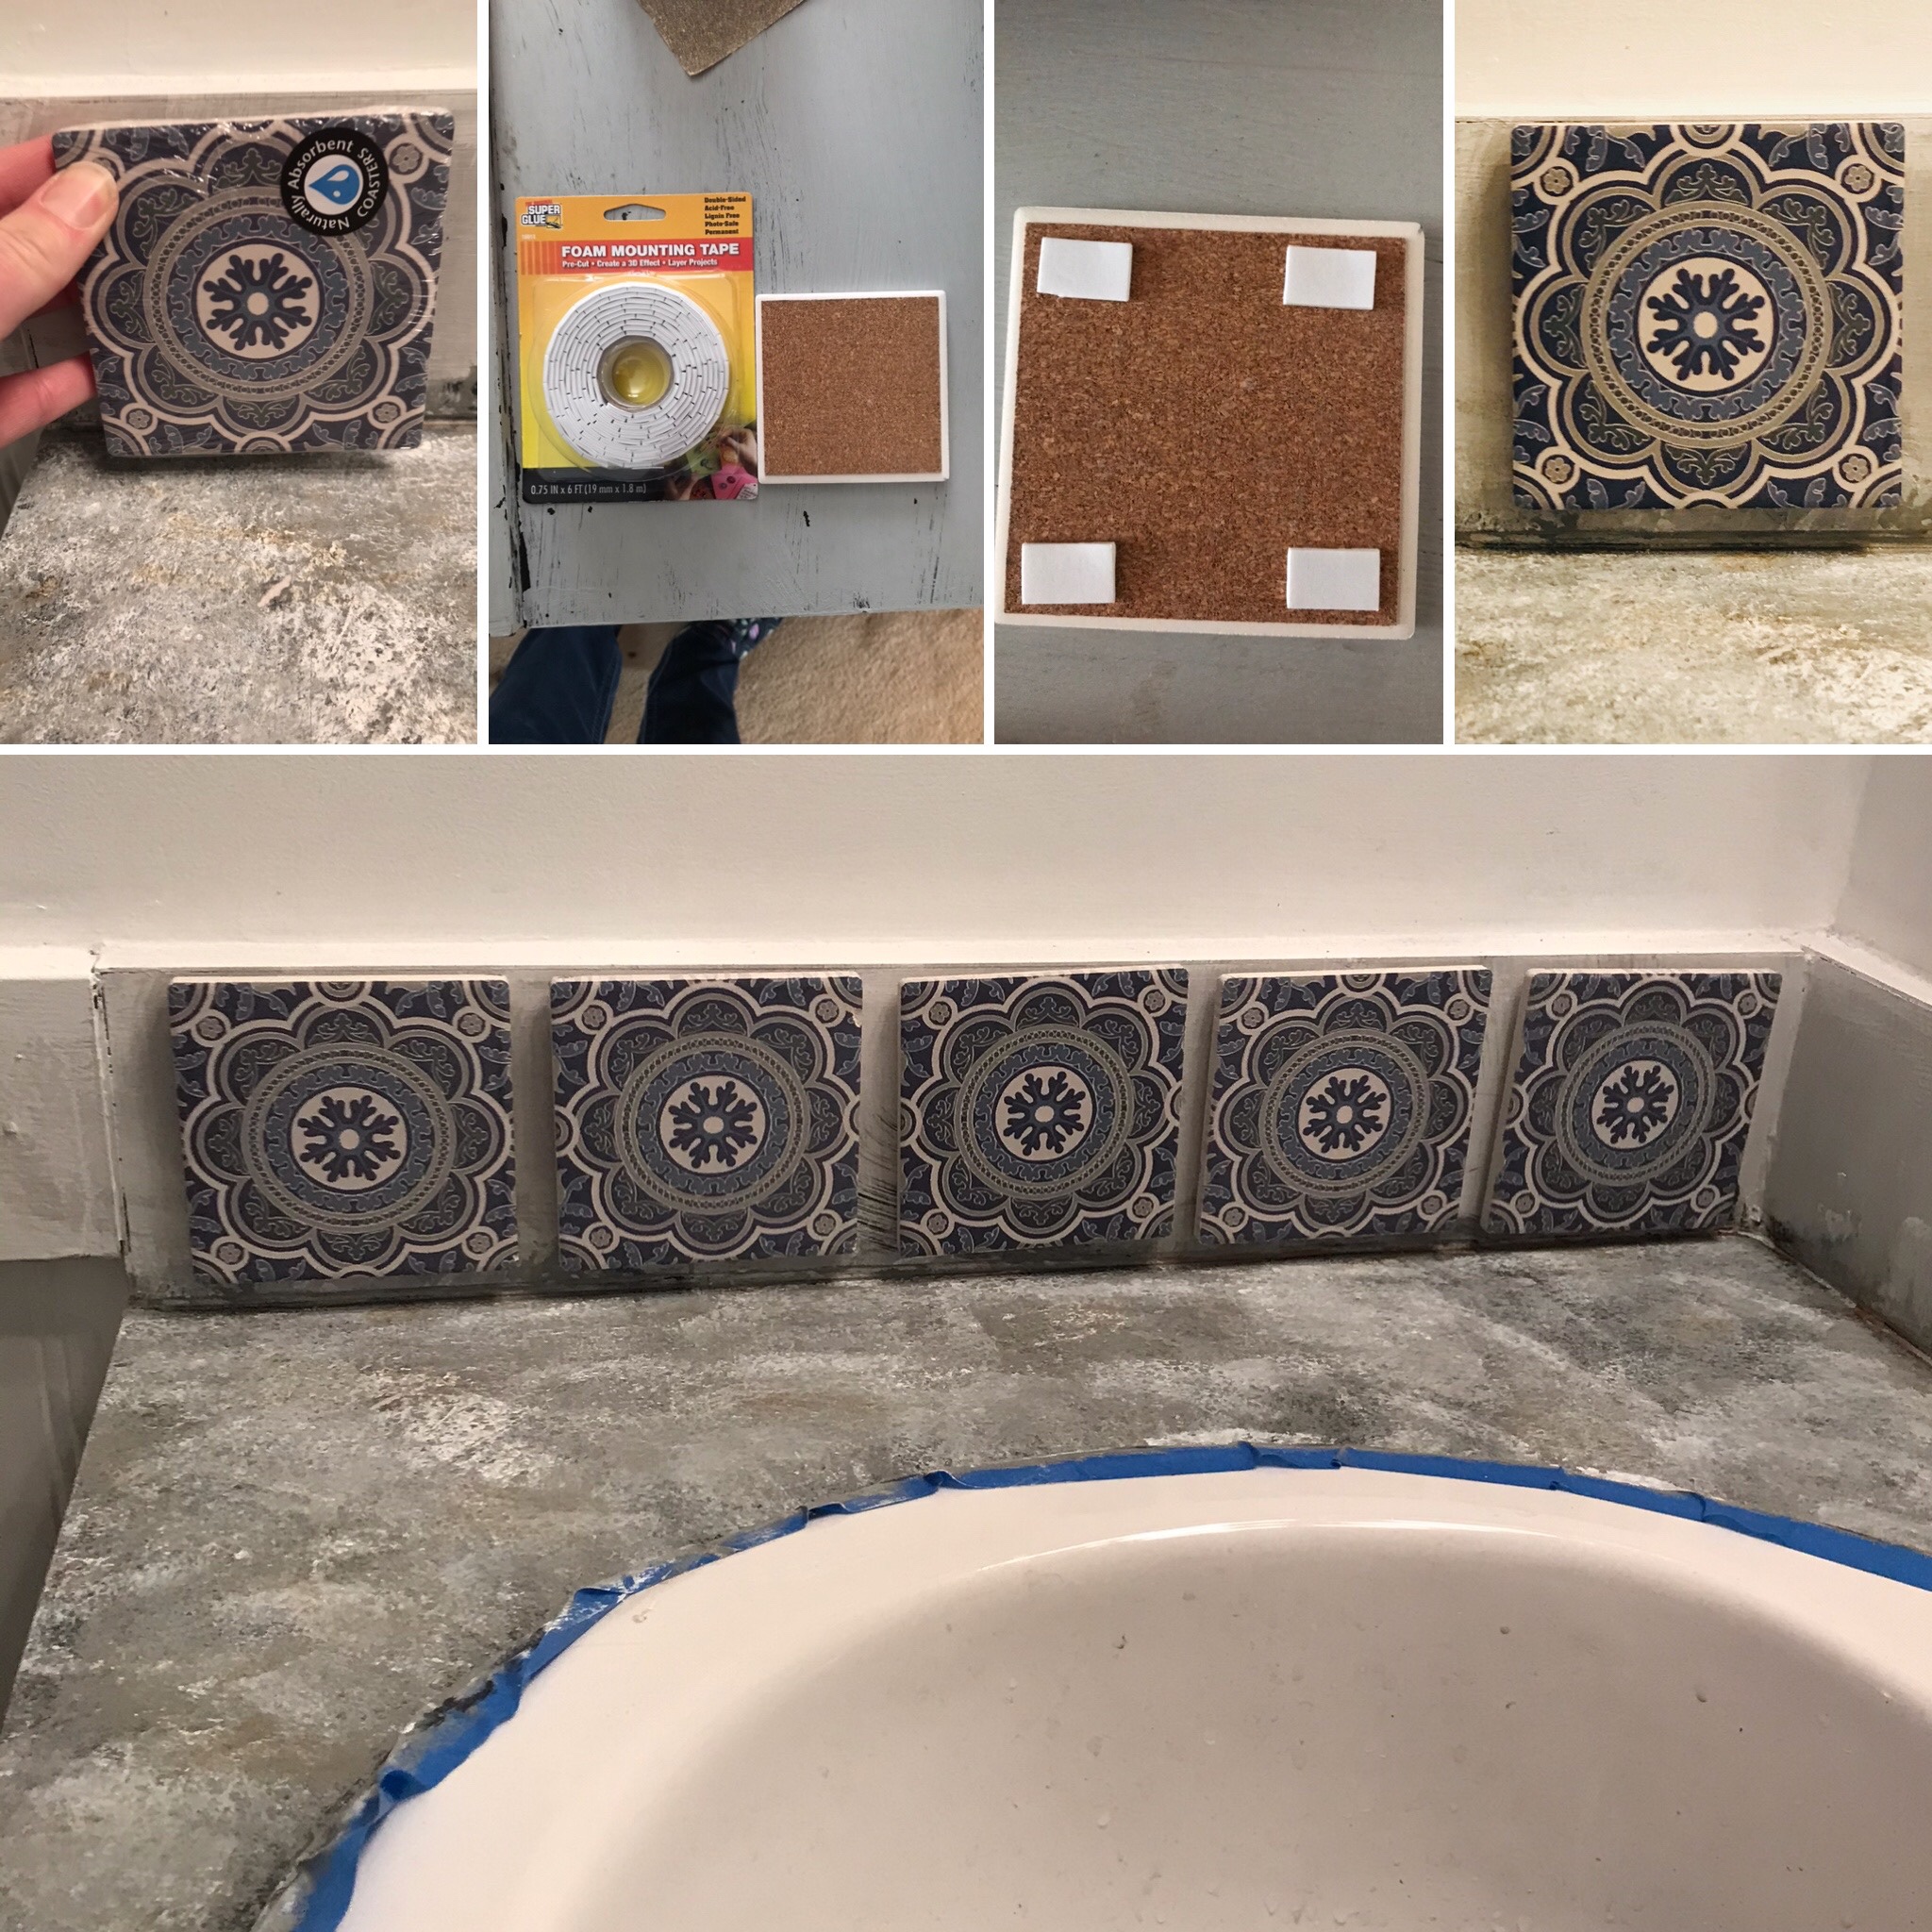
Lastly, I wanted to update the sink, #backsplash and #countertops of the bathroom. I popped into the local #DollarTree http://www.dollartree.com and purchased 12 naturally water absorbent #coastertiles with a #Grecian blue, gray and white design, as well as 2 small containers of spackling, a roll of foam tape, and a set of furniture markers.
It roughly cost me $16 for the total purchase.
The sink faucet had been an eye sore for some time as it tends to trap moldy looking residue constantly. YUCK.
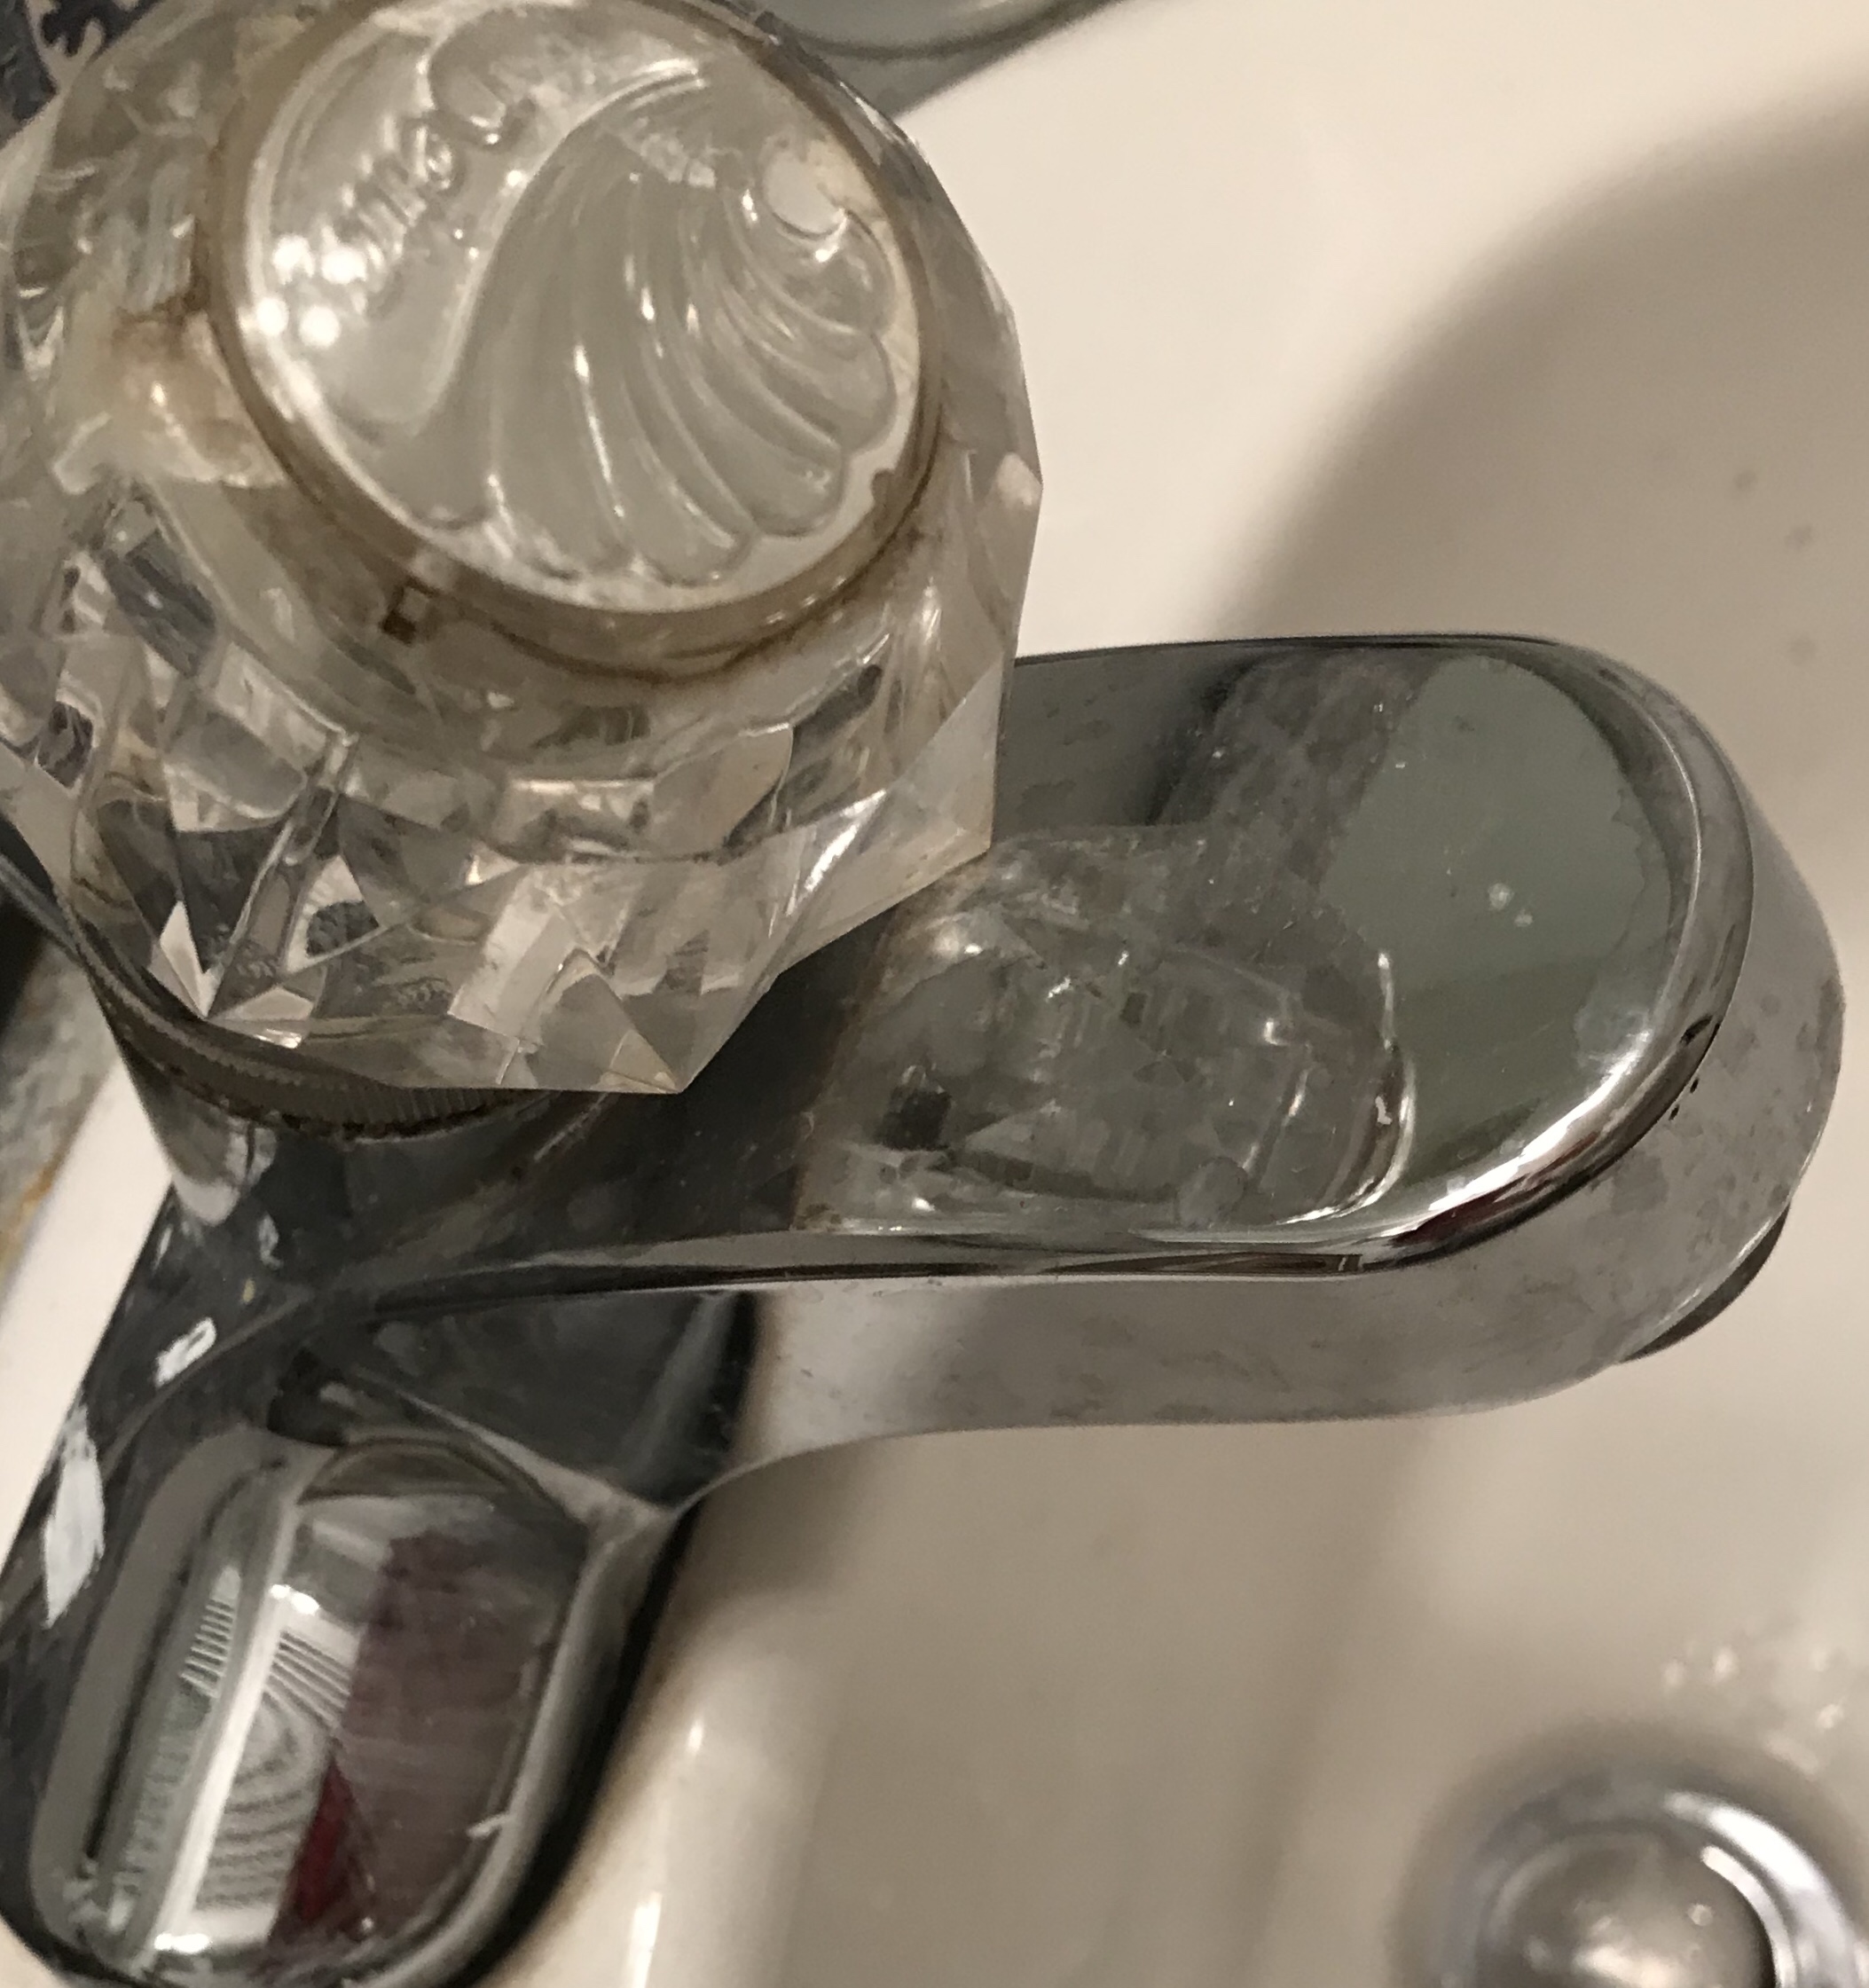
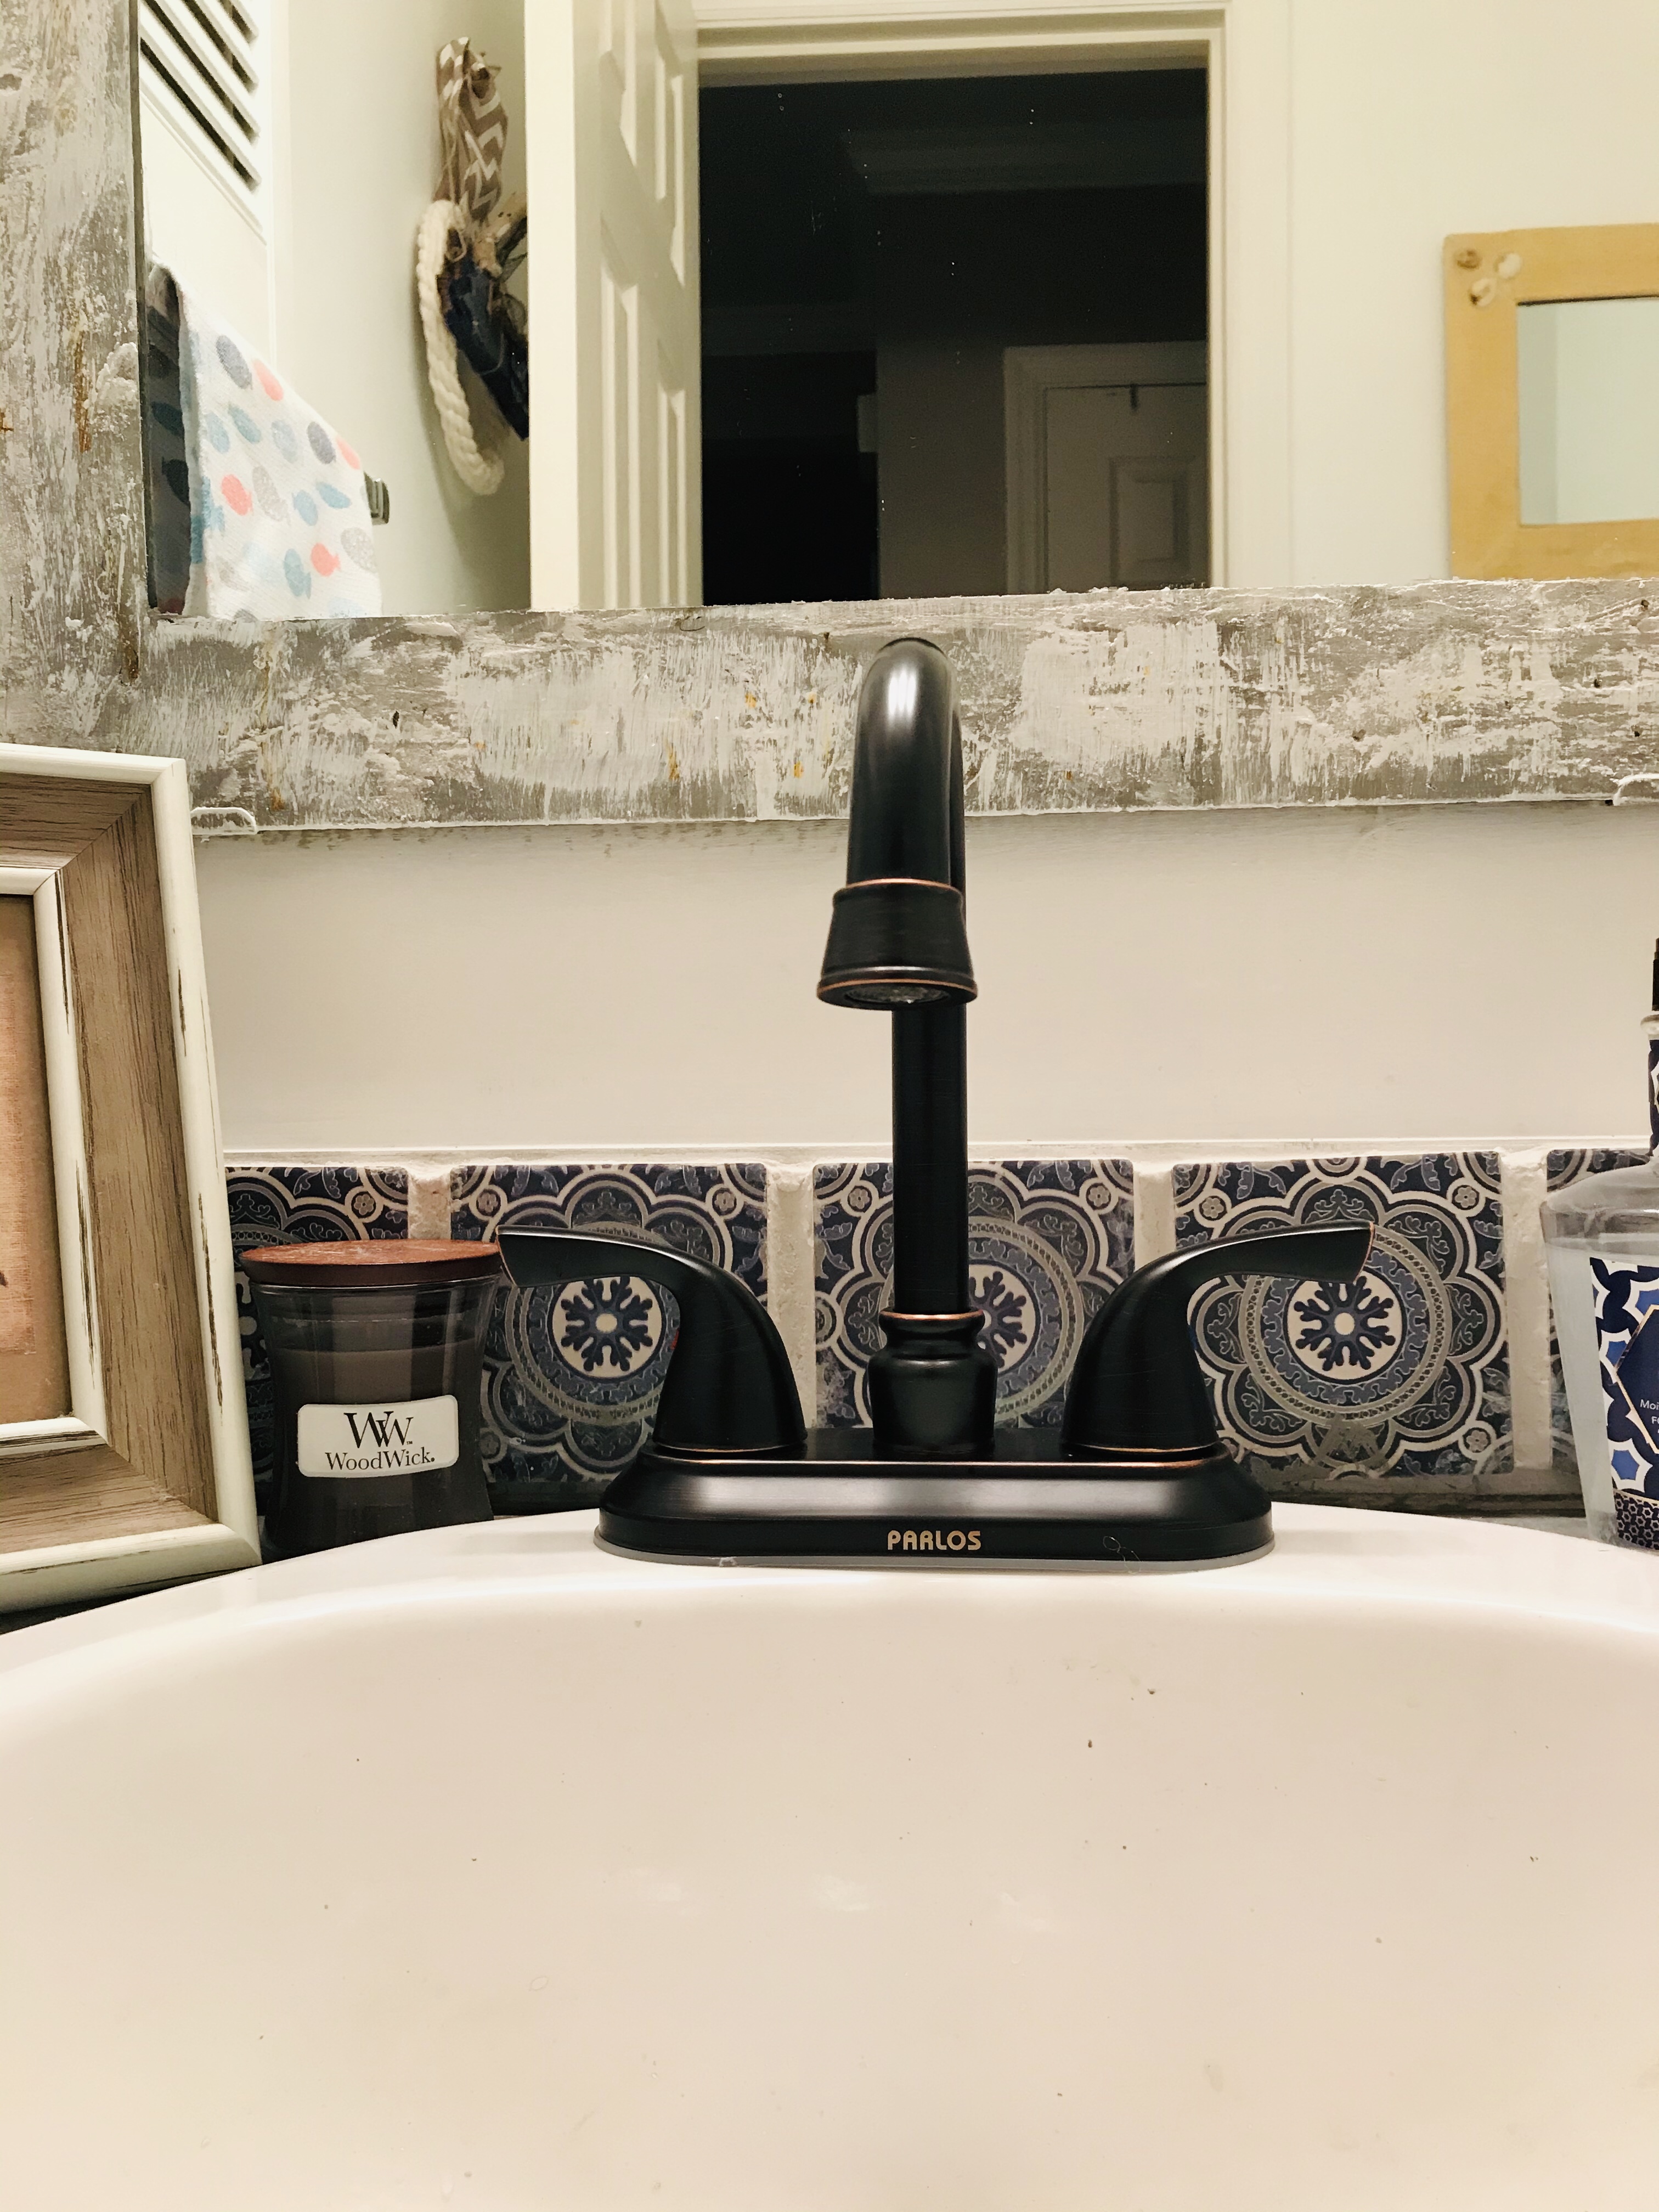
I decided it would need to be replaced to do the bathroom justice and found a pretty, more farm-style faucet by #Parlos for $38.99 on #Amazon.
Steps for Applying Backsplash Tile and Painting Countertops:
1) I mounted the #tilecoasters an inch apart with foam tape on the backsplash- then used spackling to fill in the spaces and gaps.
2) I sponged on black and white acrylic paint. When the paint dried I followed up with randomly spaced markings with the brown furniture markers.
3) Then I repeated the sponge 🧽 method with gray chalk paint— and decided to add a bit more white and a light blue blue acrylic to soften the look.
4) Once dry, I used sand paper to even out the look and feel of the countertop.
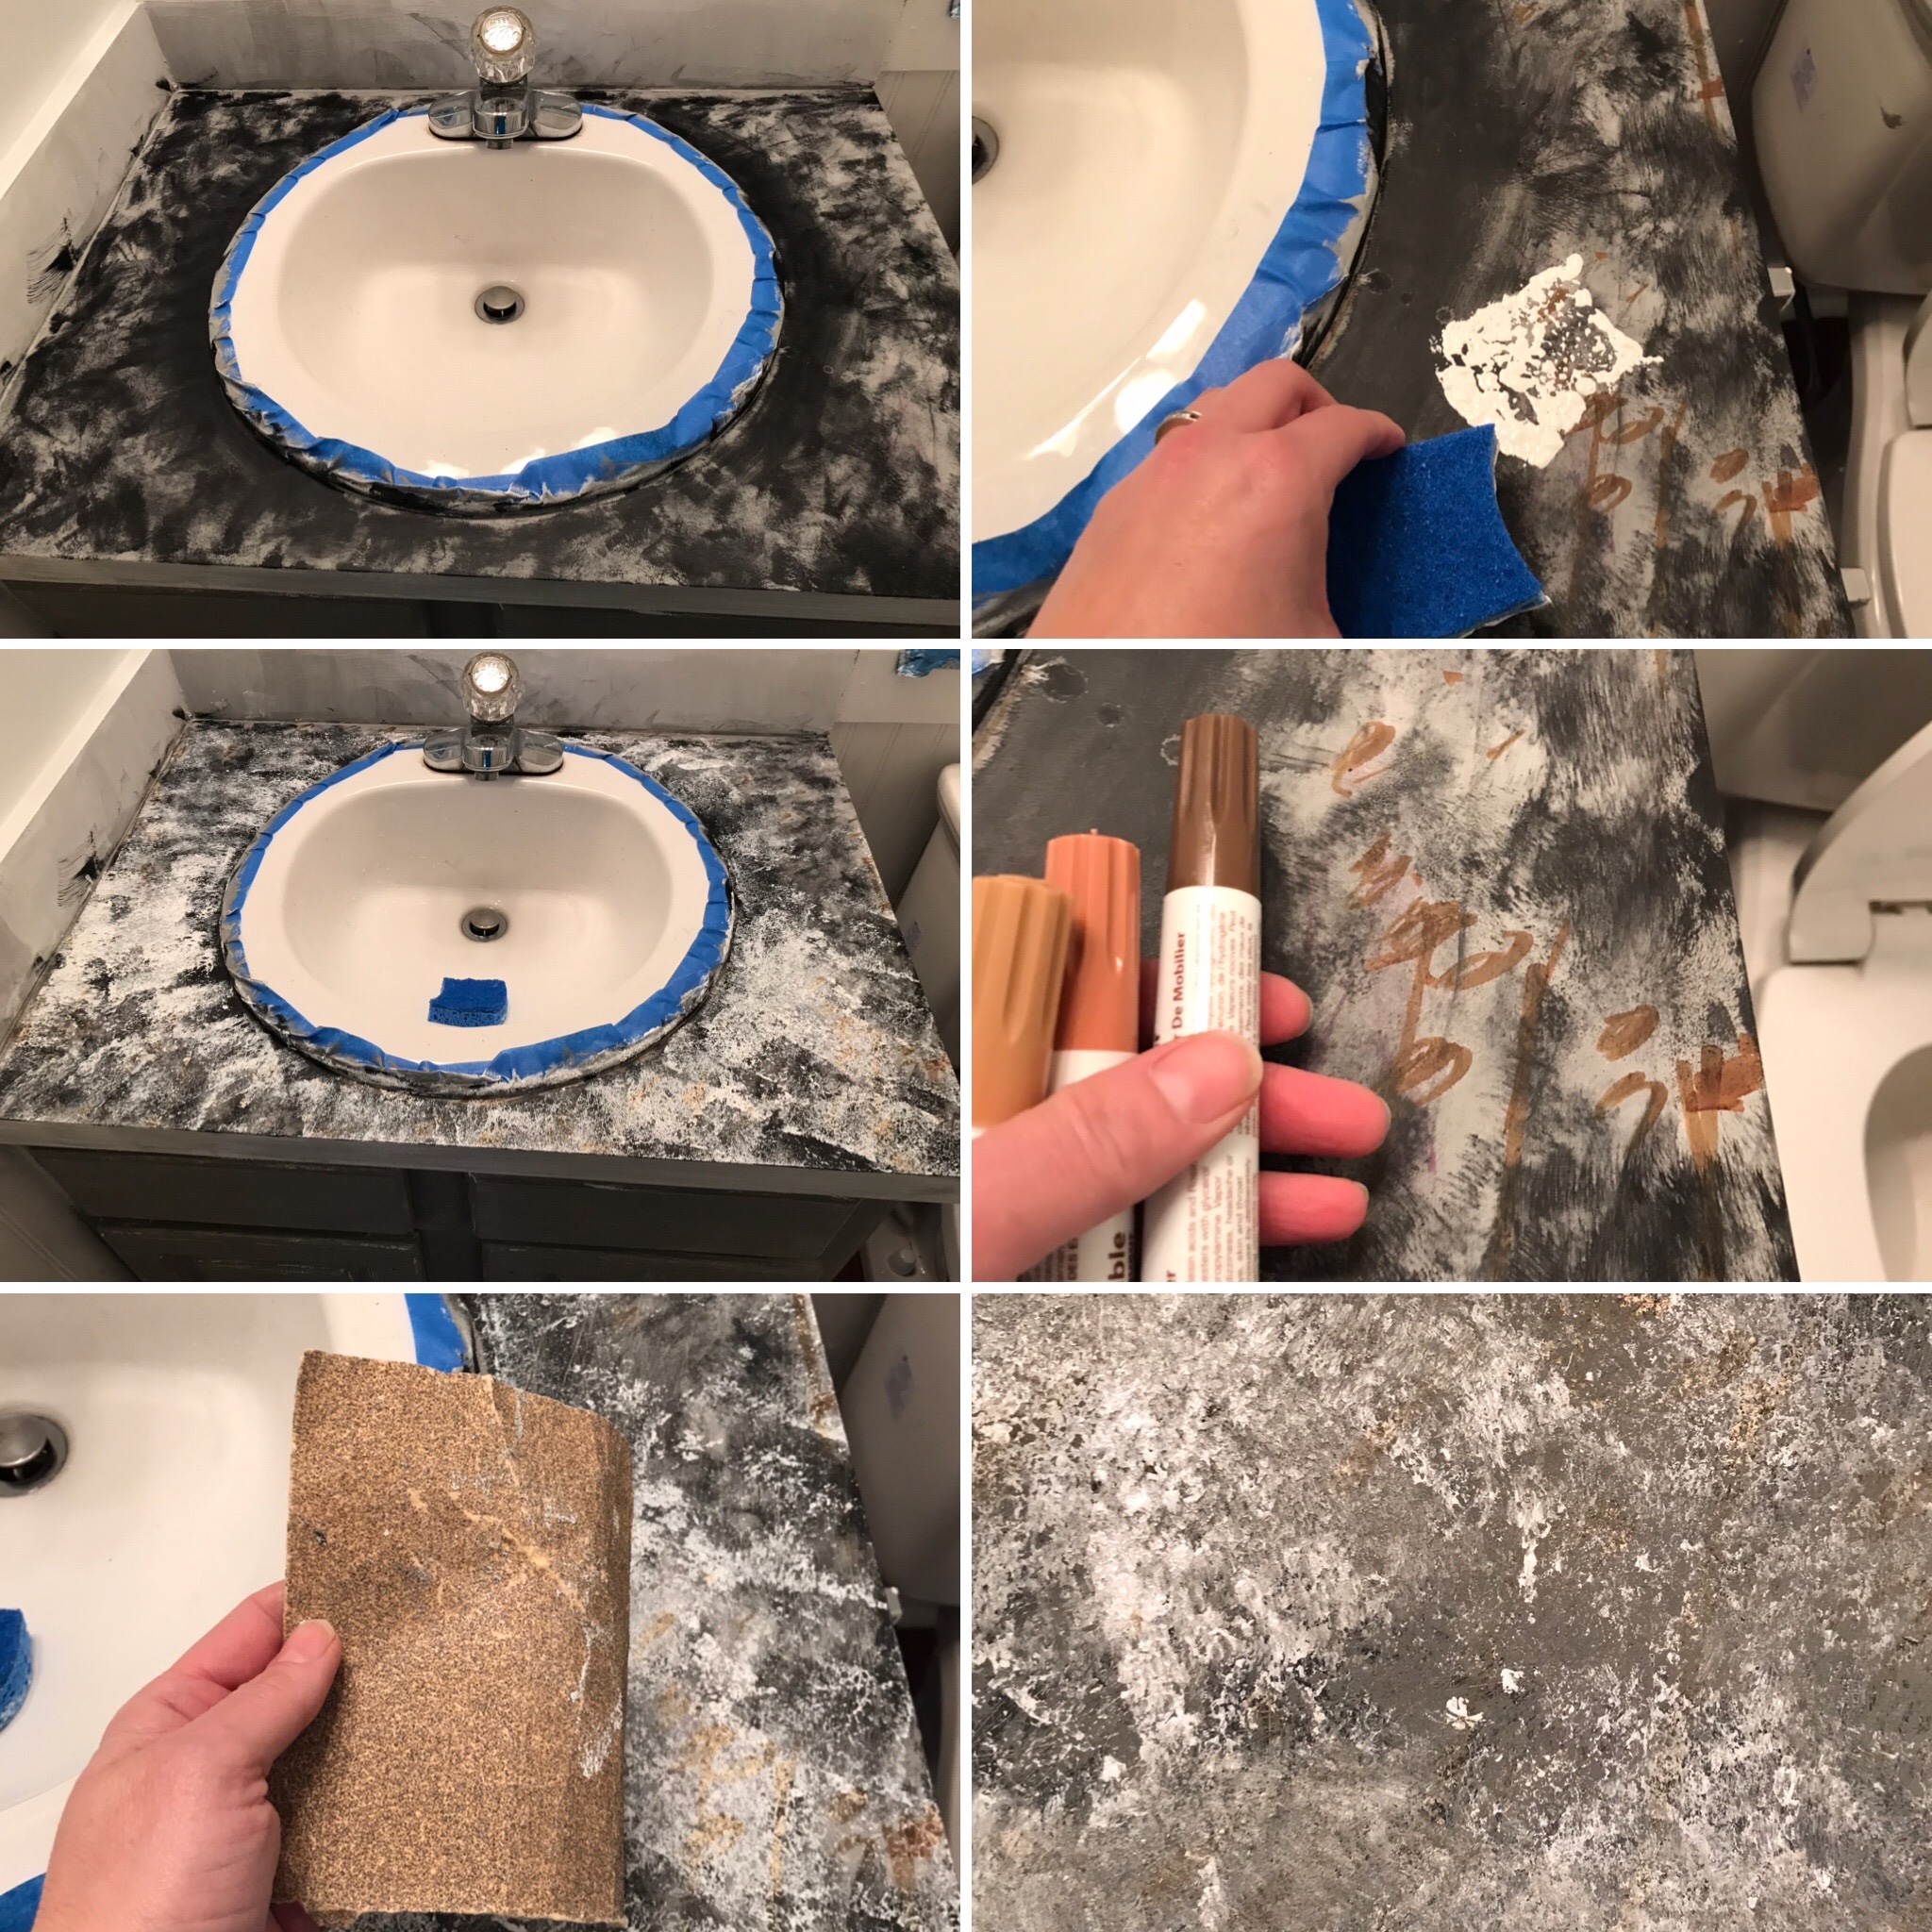
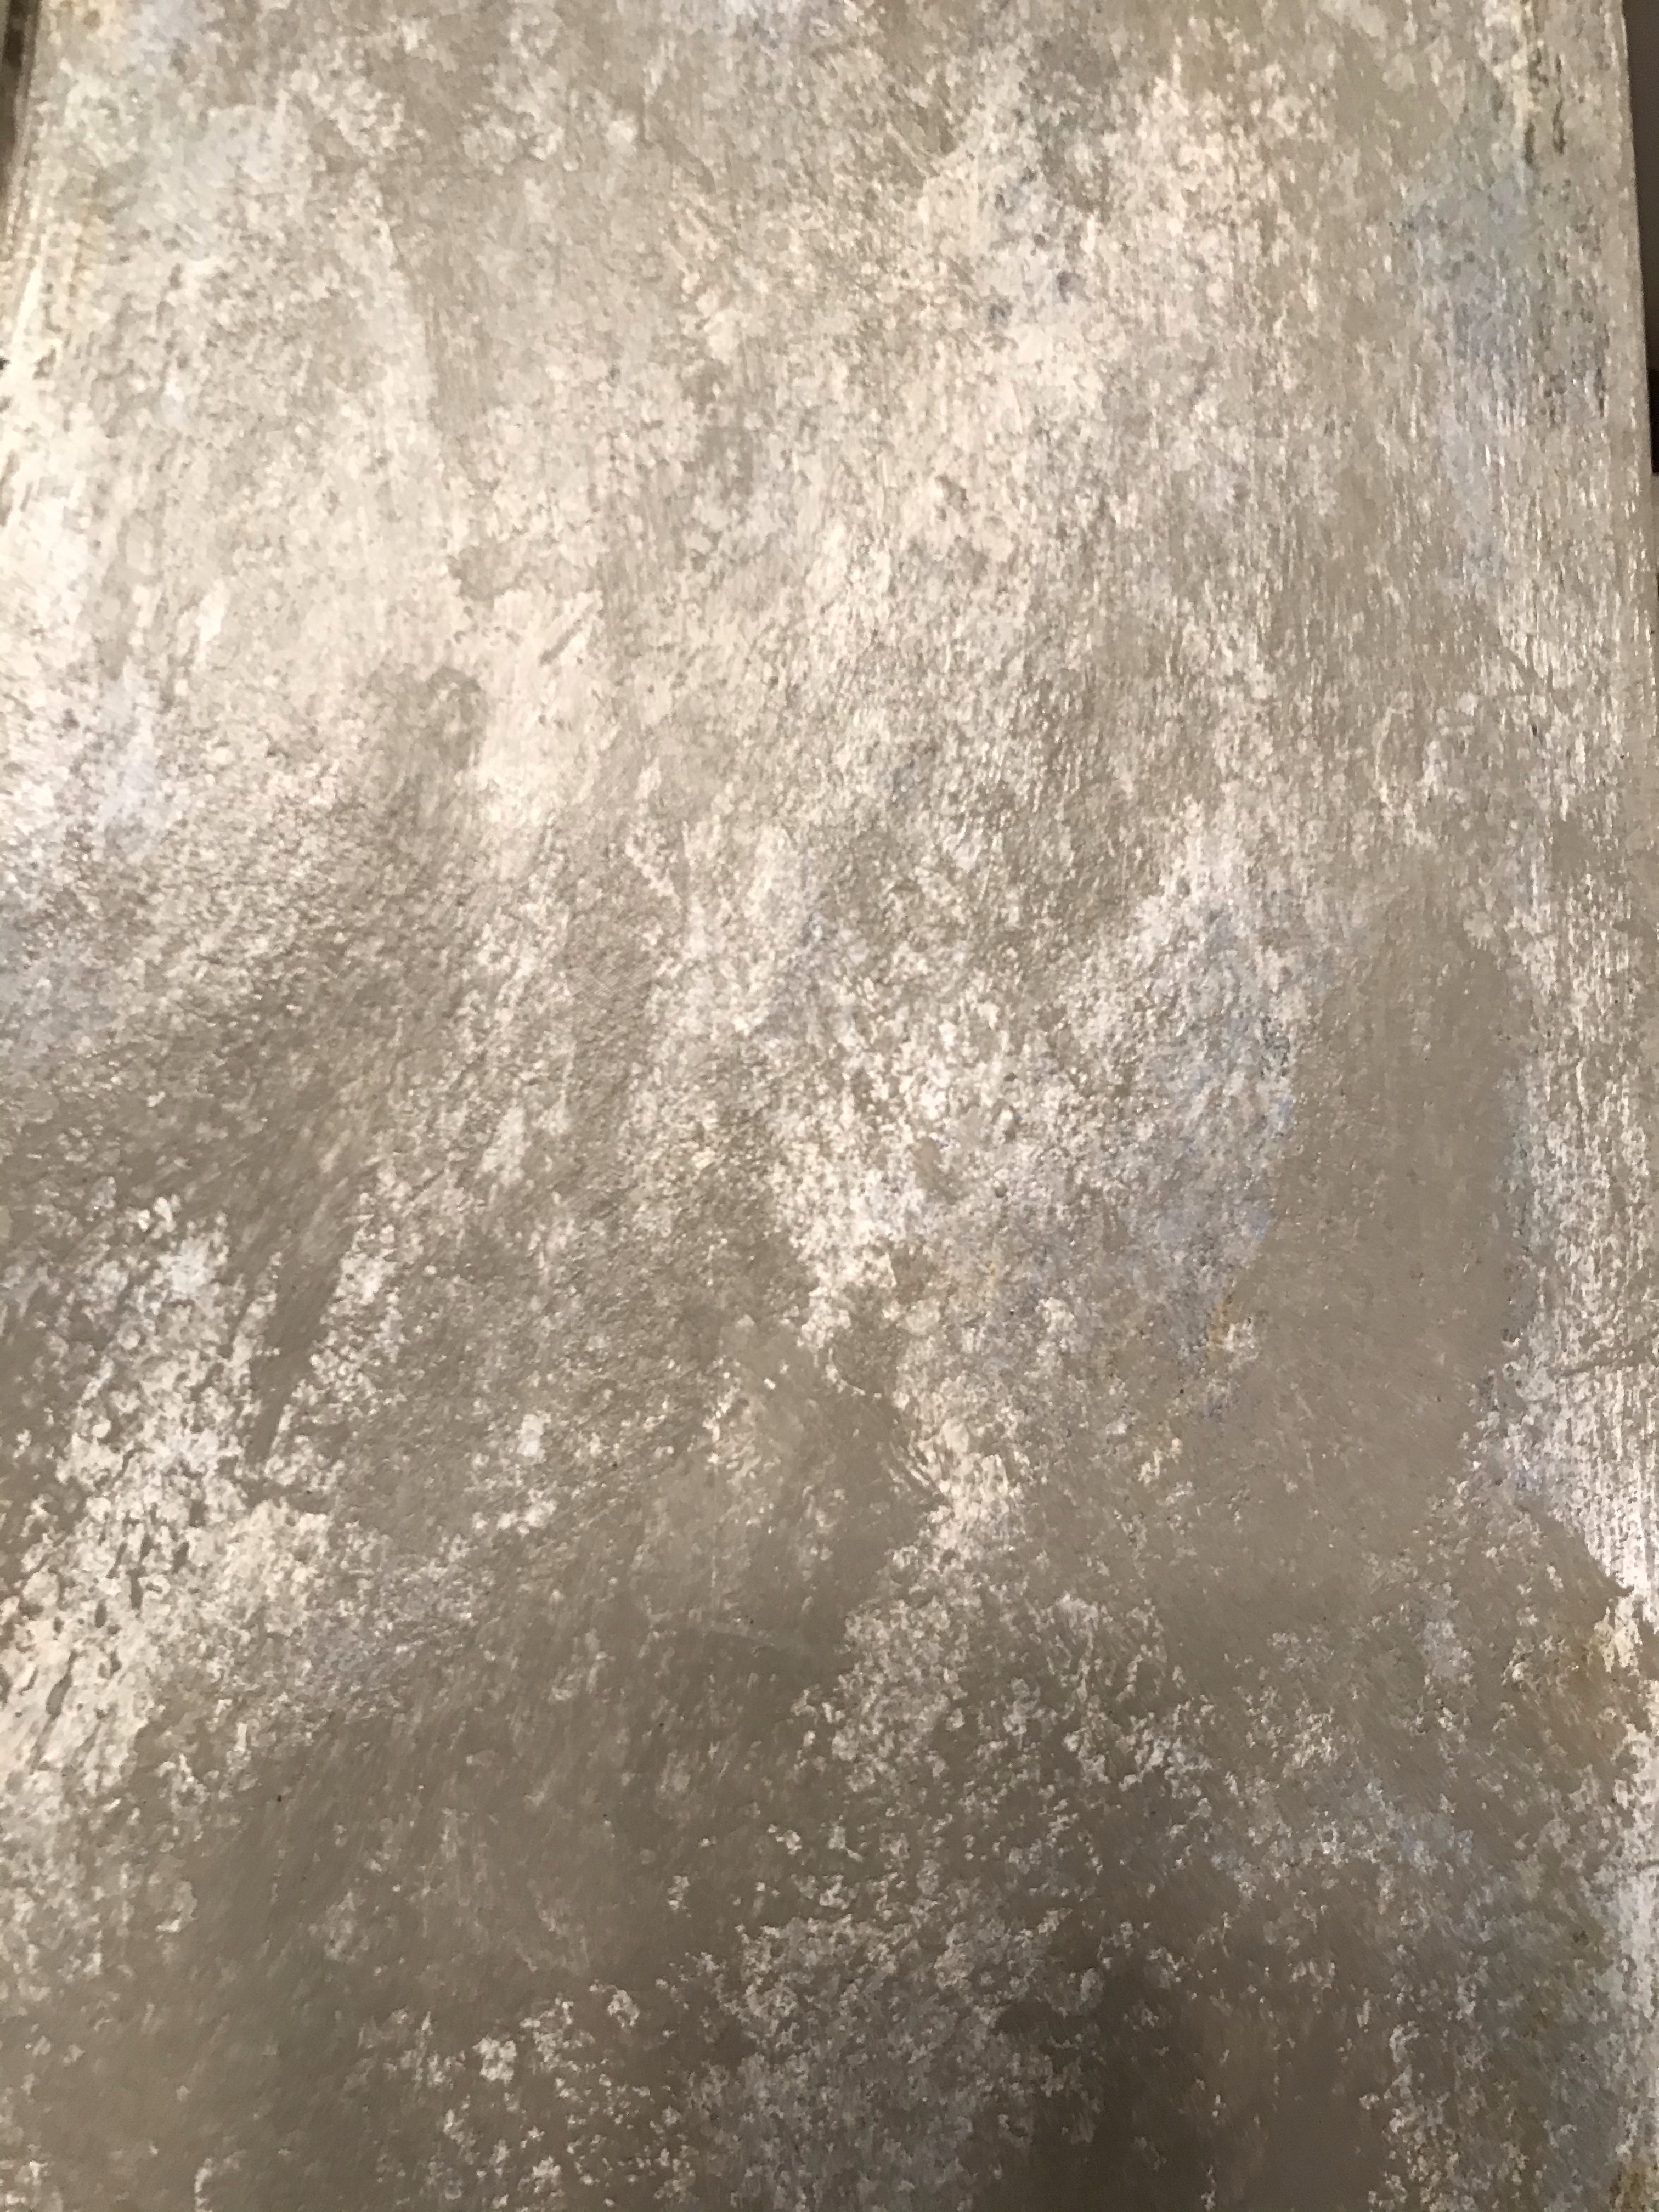
5) To finish I brushed on polycryllic sealant to protect and seal the paint. This method gave a #granite look to the #countertop.
I used this same #refurbish idea on my #kitchencounters a few years ago and have been pleased with the outcome.
Steps for Faux Wood Frame on Bathroom Mirror:

1) The bathroom mirror needed an update as well. I wanted to give it a #woodframe appearance. I first taped off the dimensions of the frame space.
2) Then I painted the base with gray chalk paint. Allowed it to dry and again used the brown furniture markers to give it a #woodgrain texture.
3) I wanted the frame to appear as realistic to wood as possible so my husband suggested I use white spackling to give the frame more texture.
4) Once dry, I lightly topped with thin, light strokes of white paint.
5) Lastly, I applied polycryllic sealant to protect the finish.
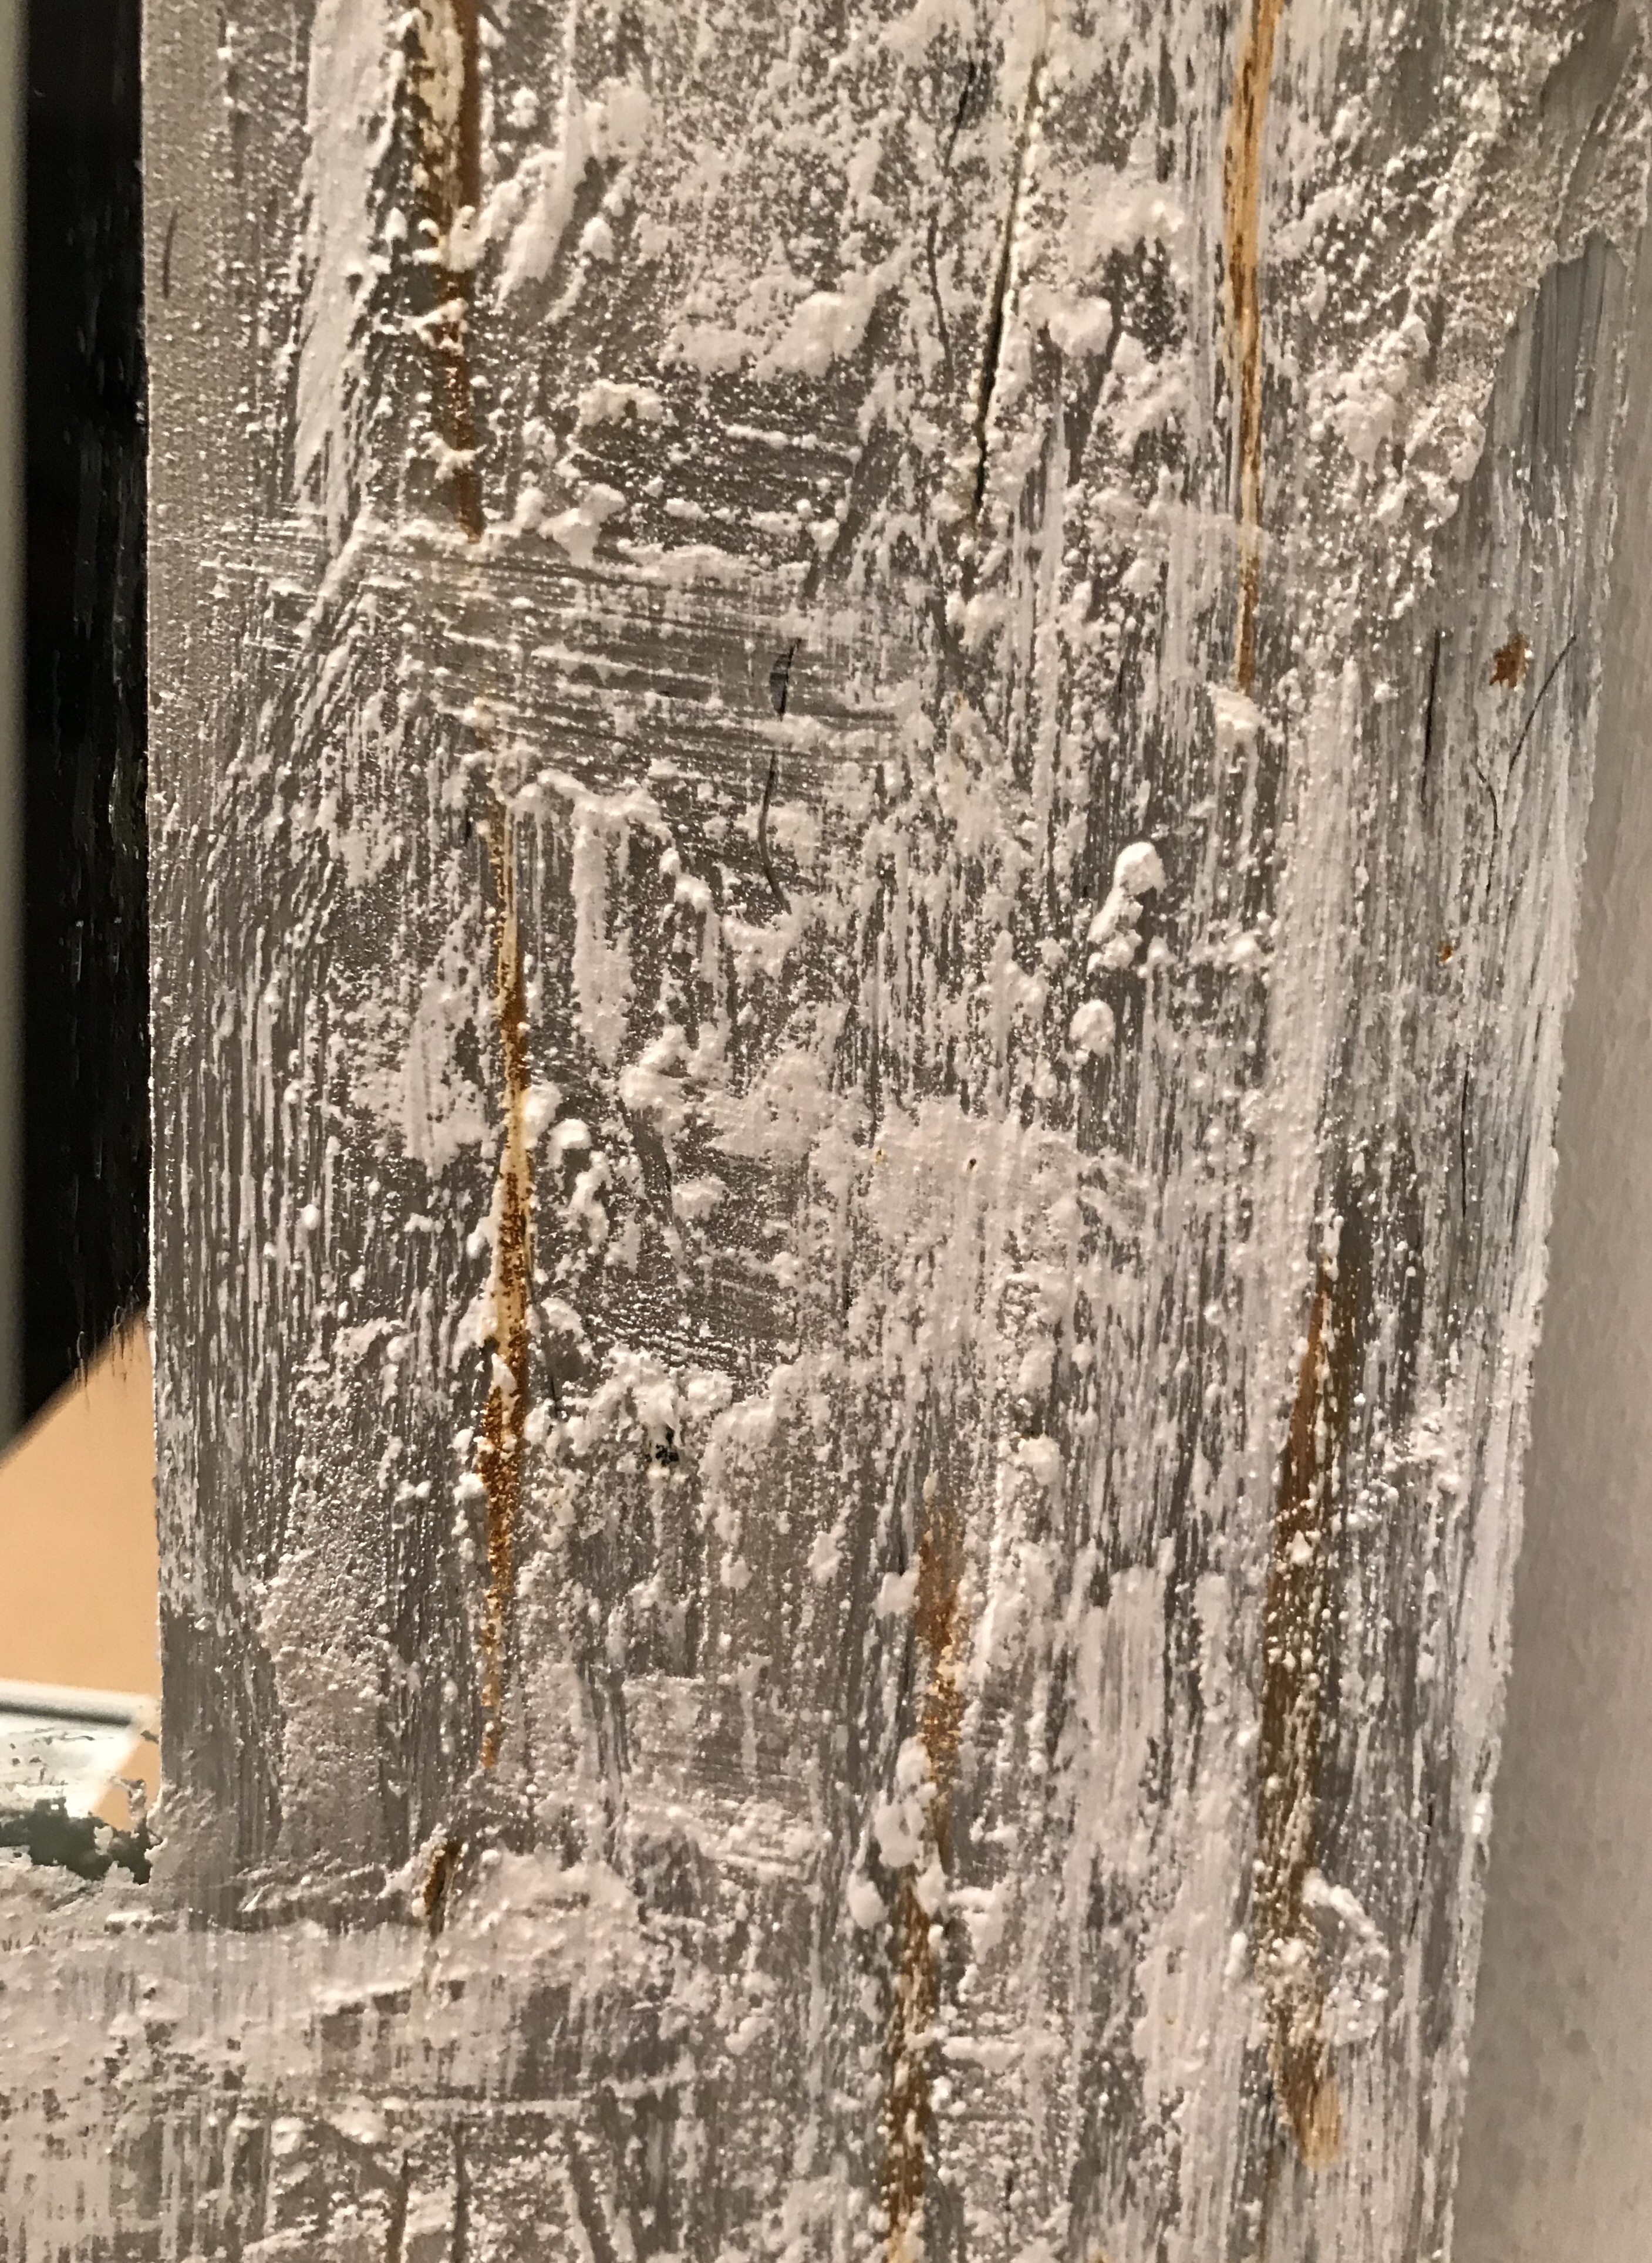
Honestly, the #fauxwood frame is by far my favorite feature of the bathroom project and I’ve received so many complements on how unique and great it looks!
Steps for Chalk Painting Wooden Floor:
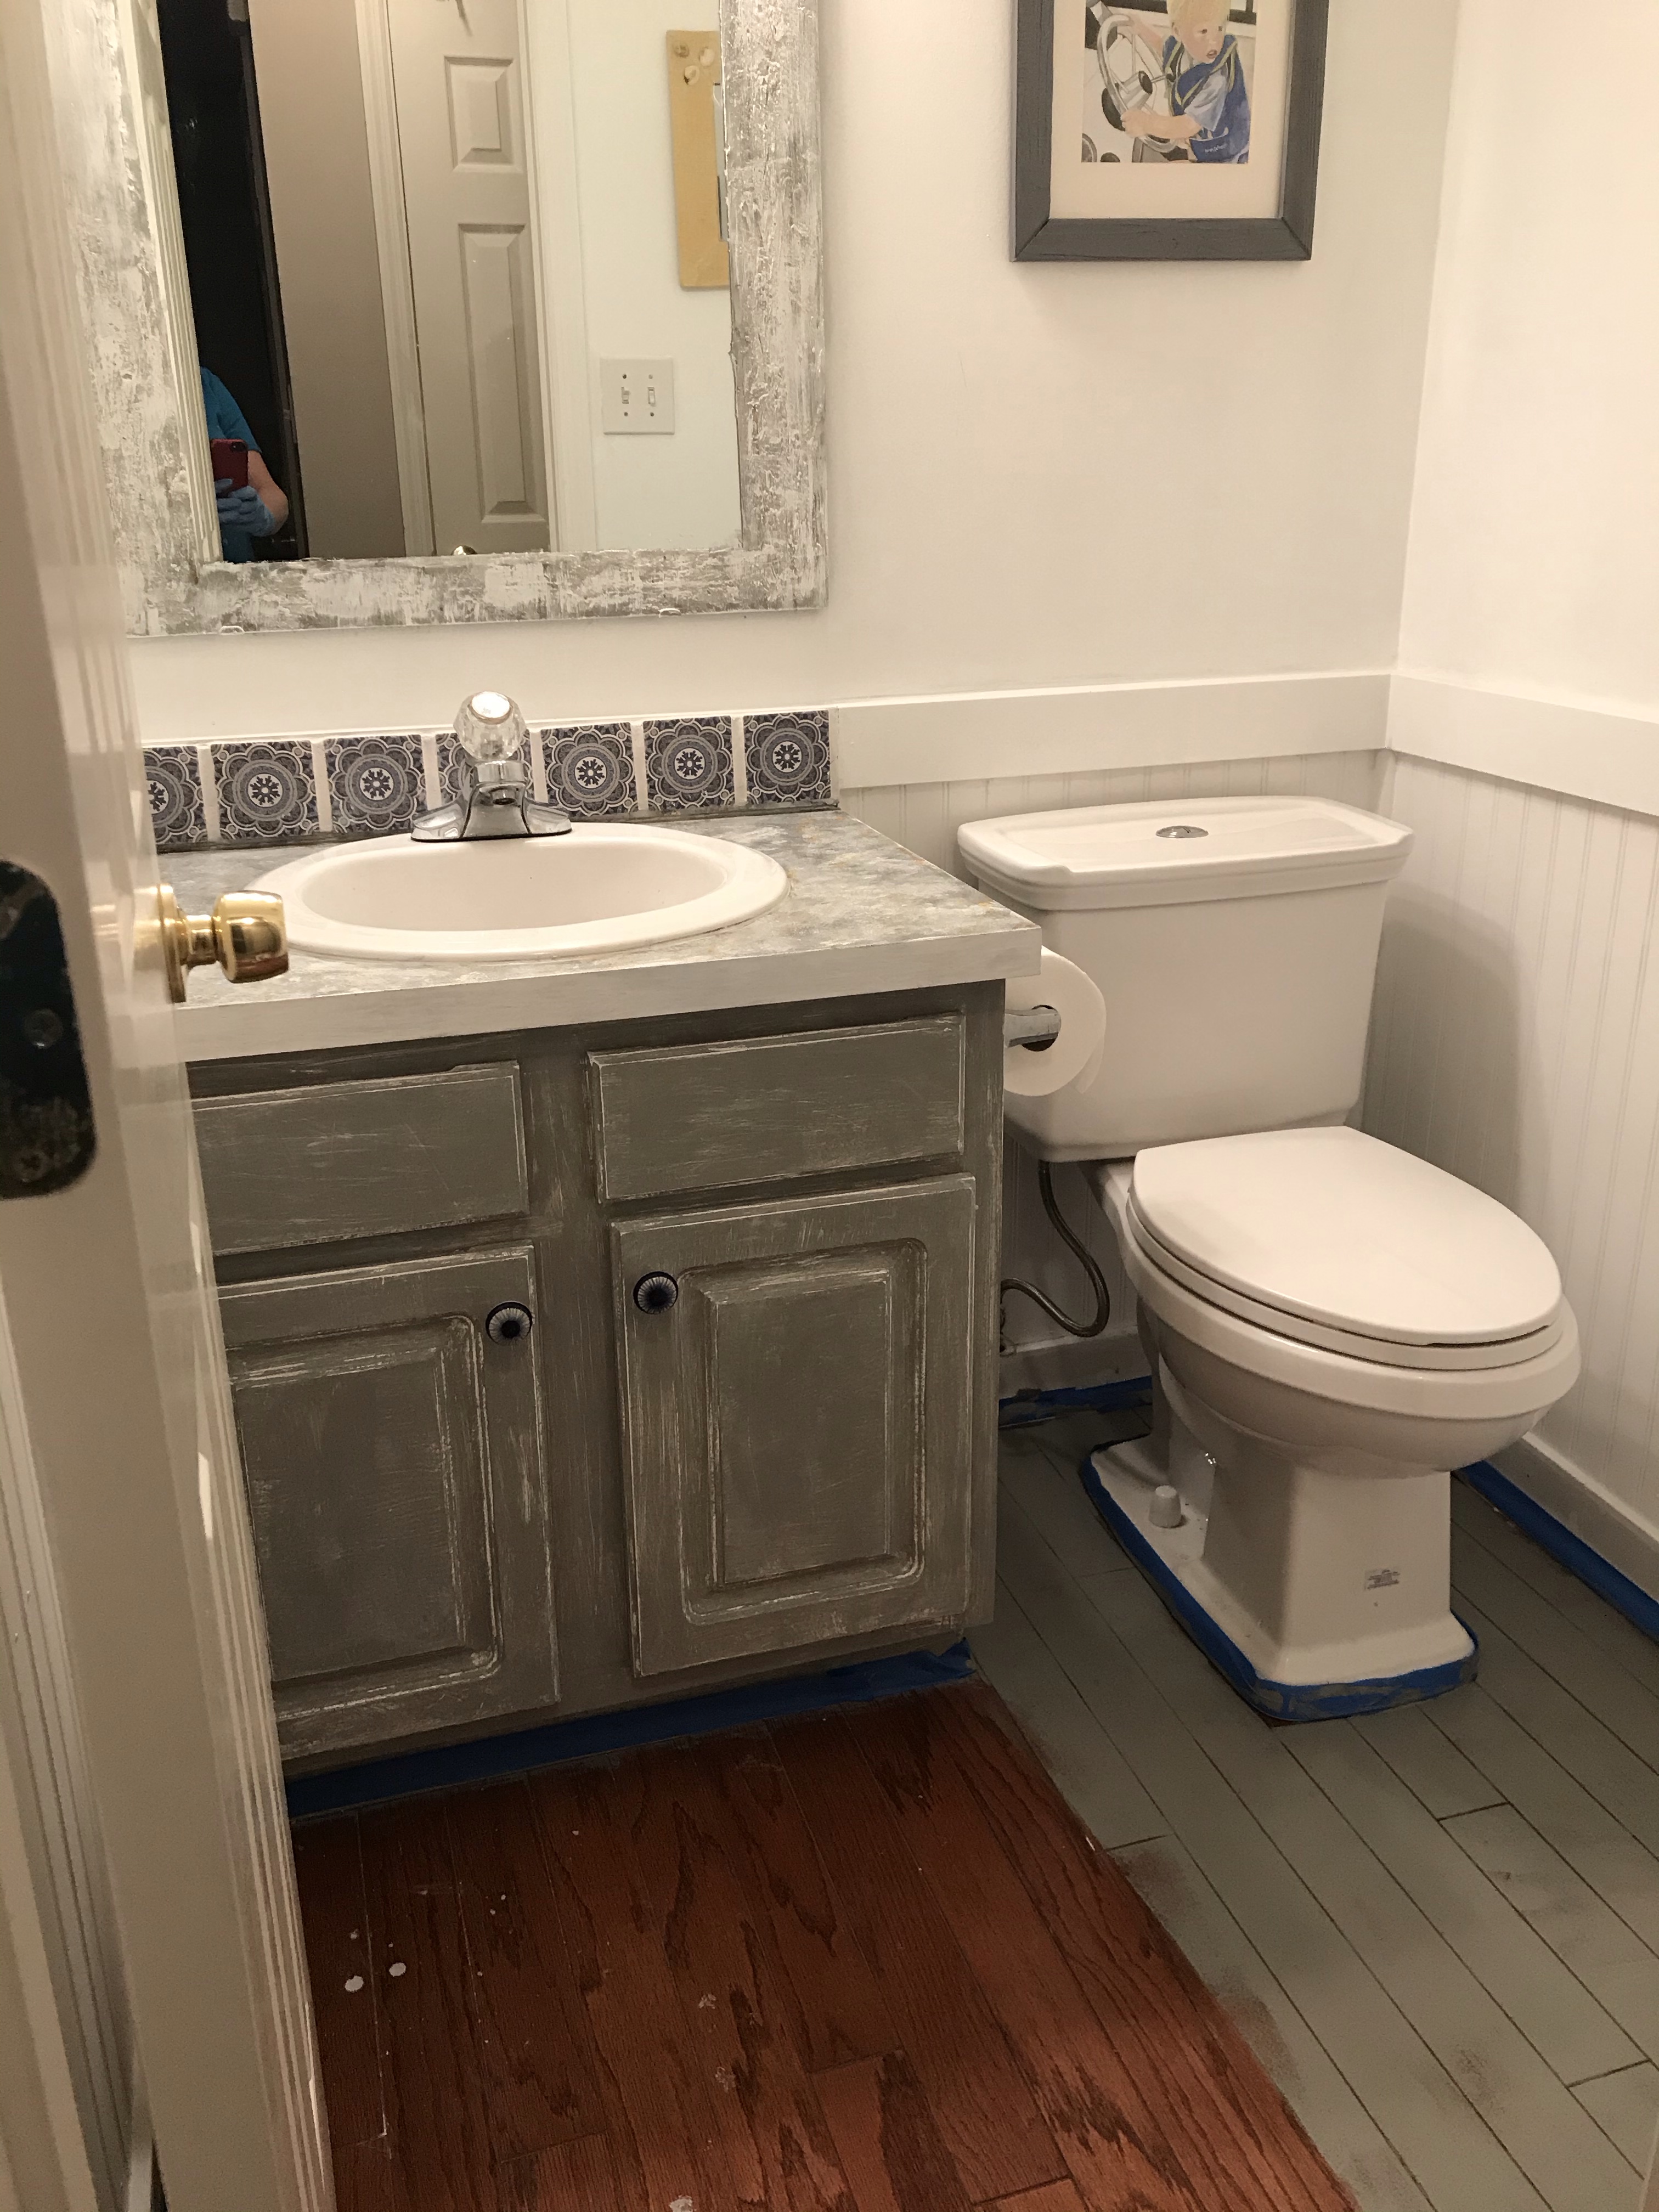
1) First you will want to place painters tape around the floor base molding, toilet base and vanity at floor board. Then use a small paint roller, dip in chalk paint and roll the paint even along each wood board.
2) Once paint dries and you are happy with the color and coating appearance, evenly apply polyurethane either with a brush or paint roller to seal and protect the underlying paint.
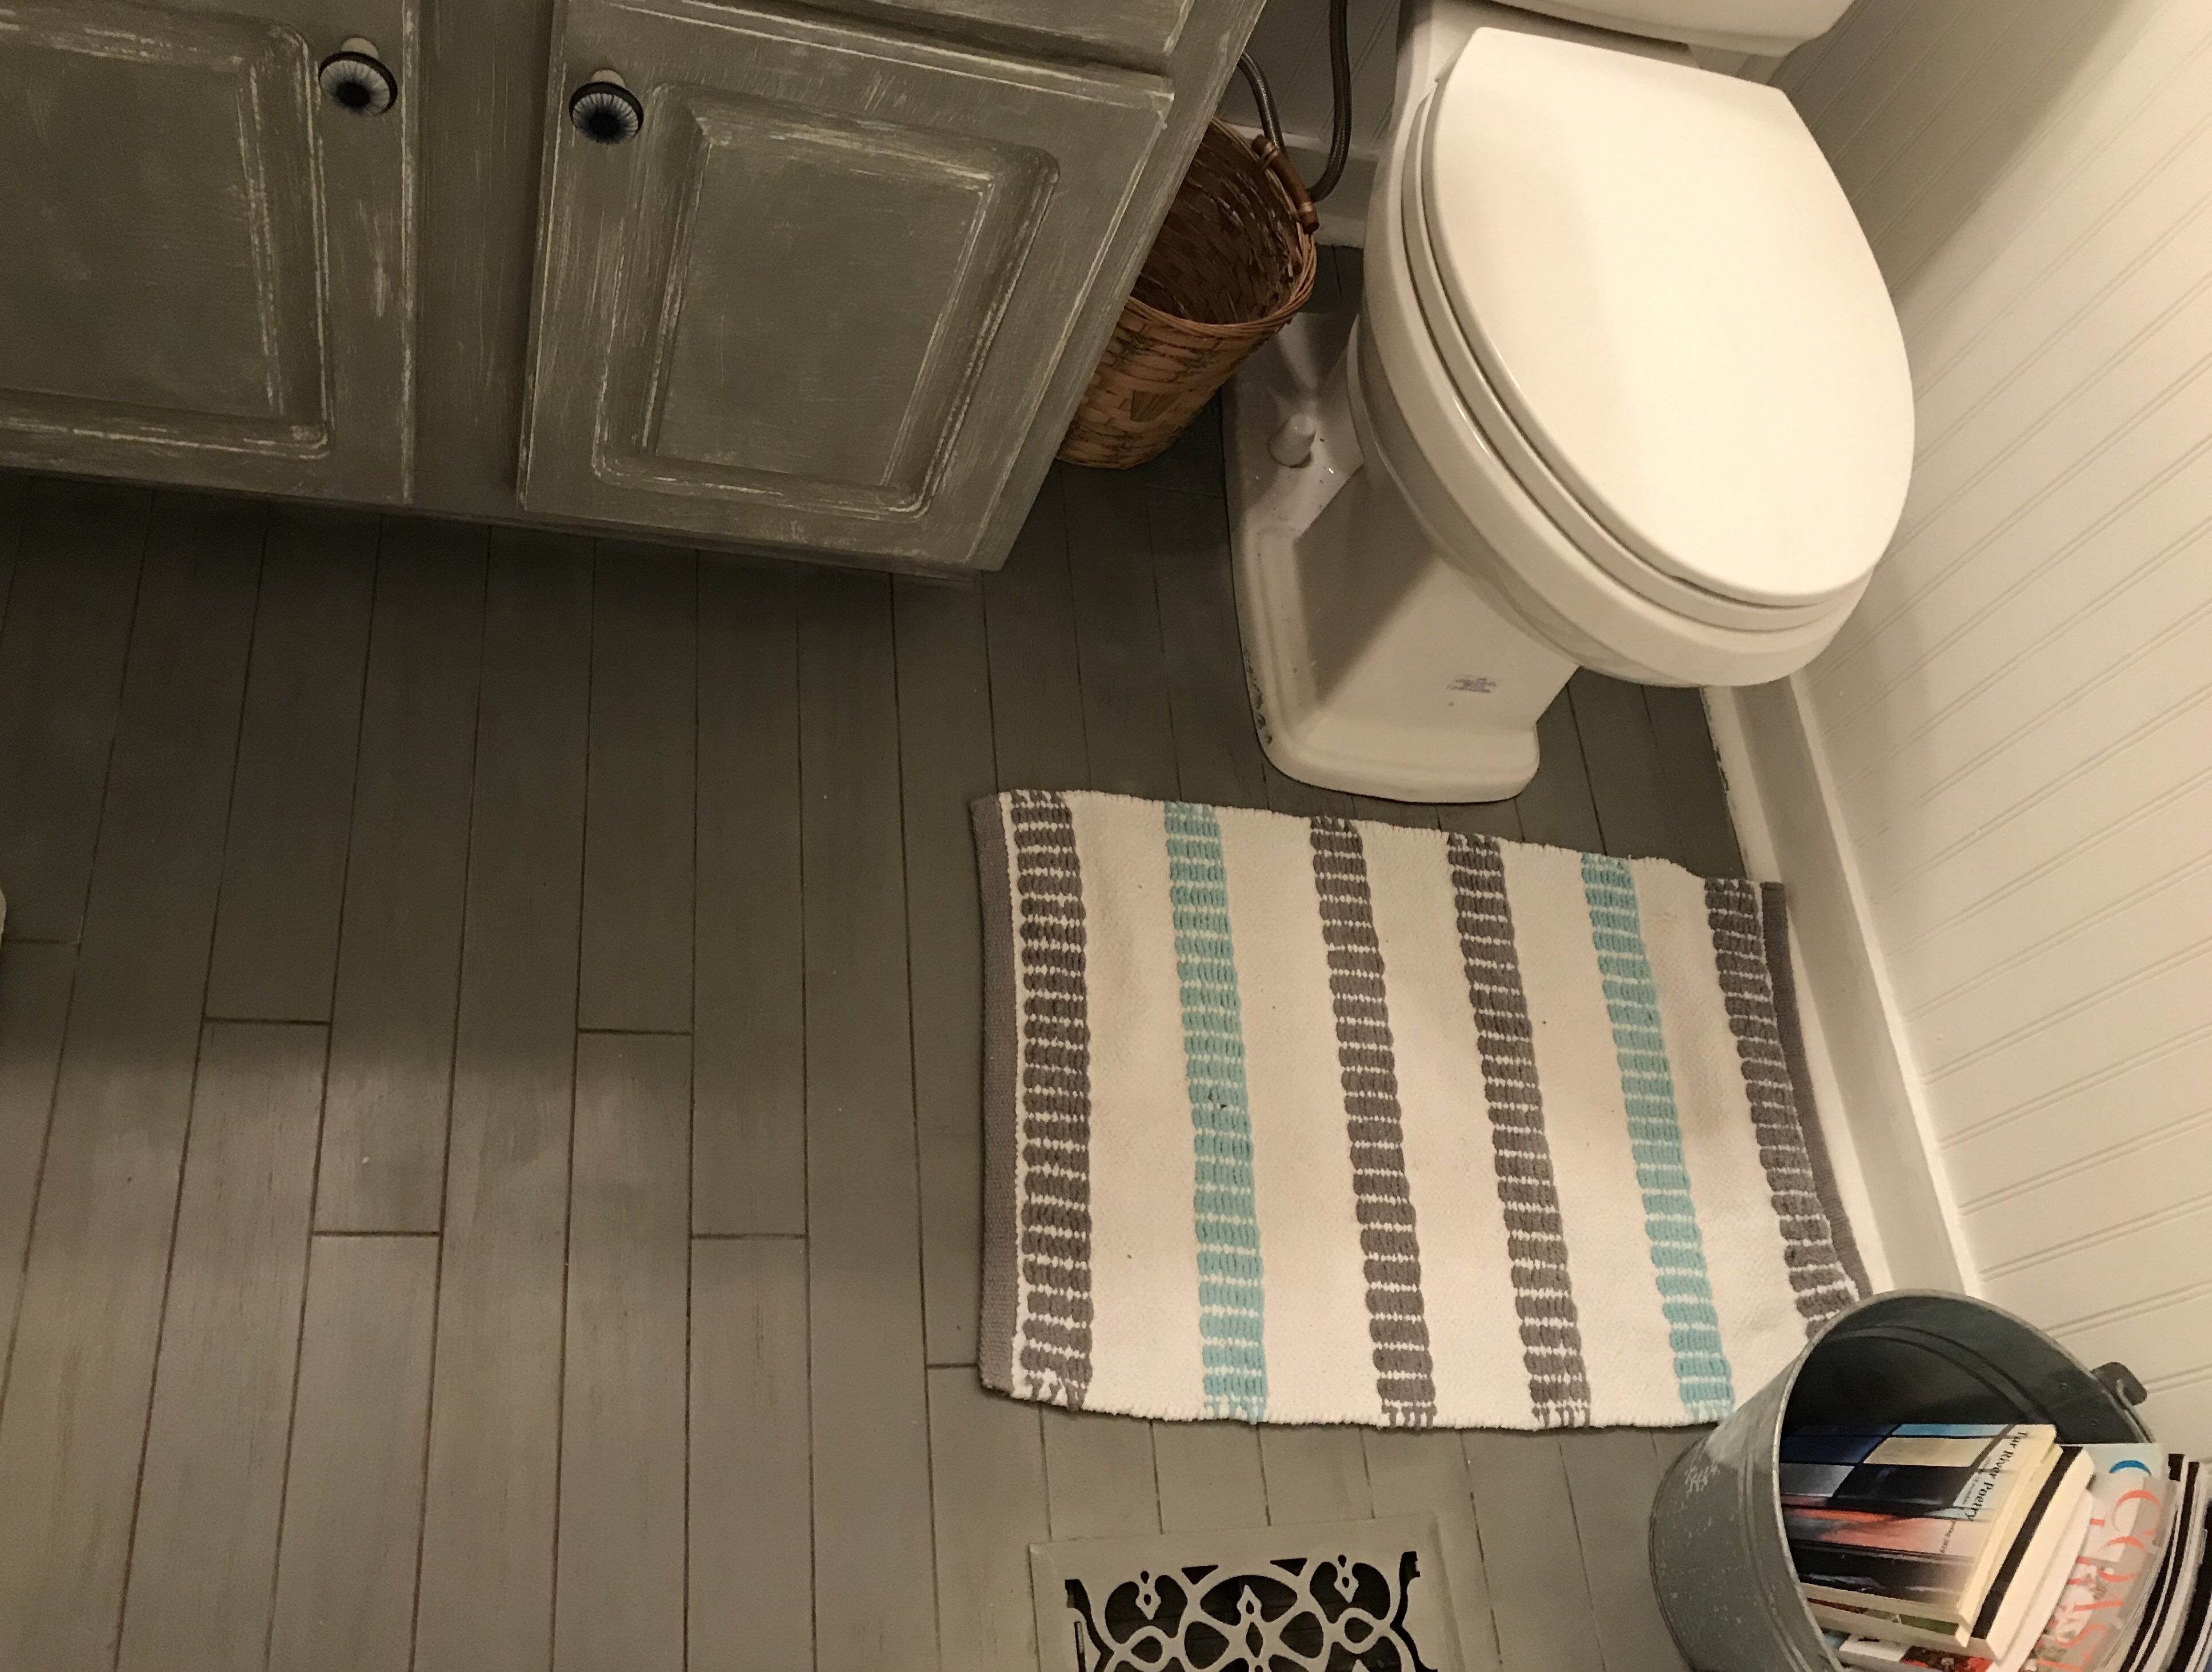
#AddAccents to create a #FinishedSpace—
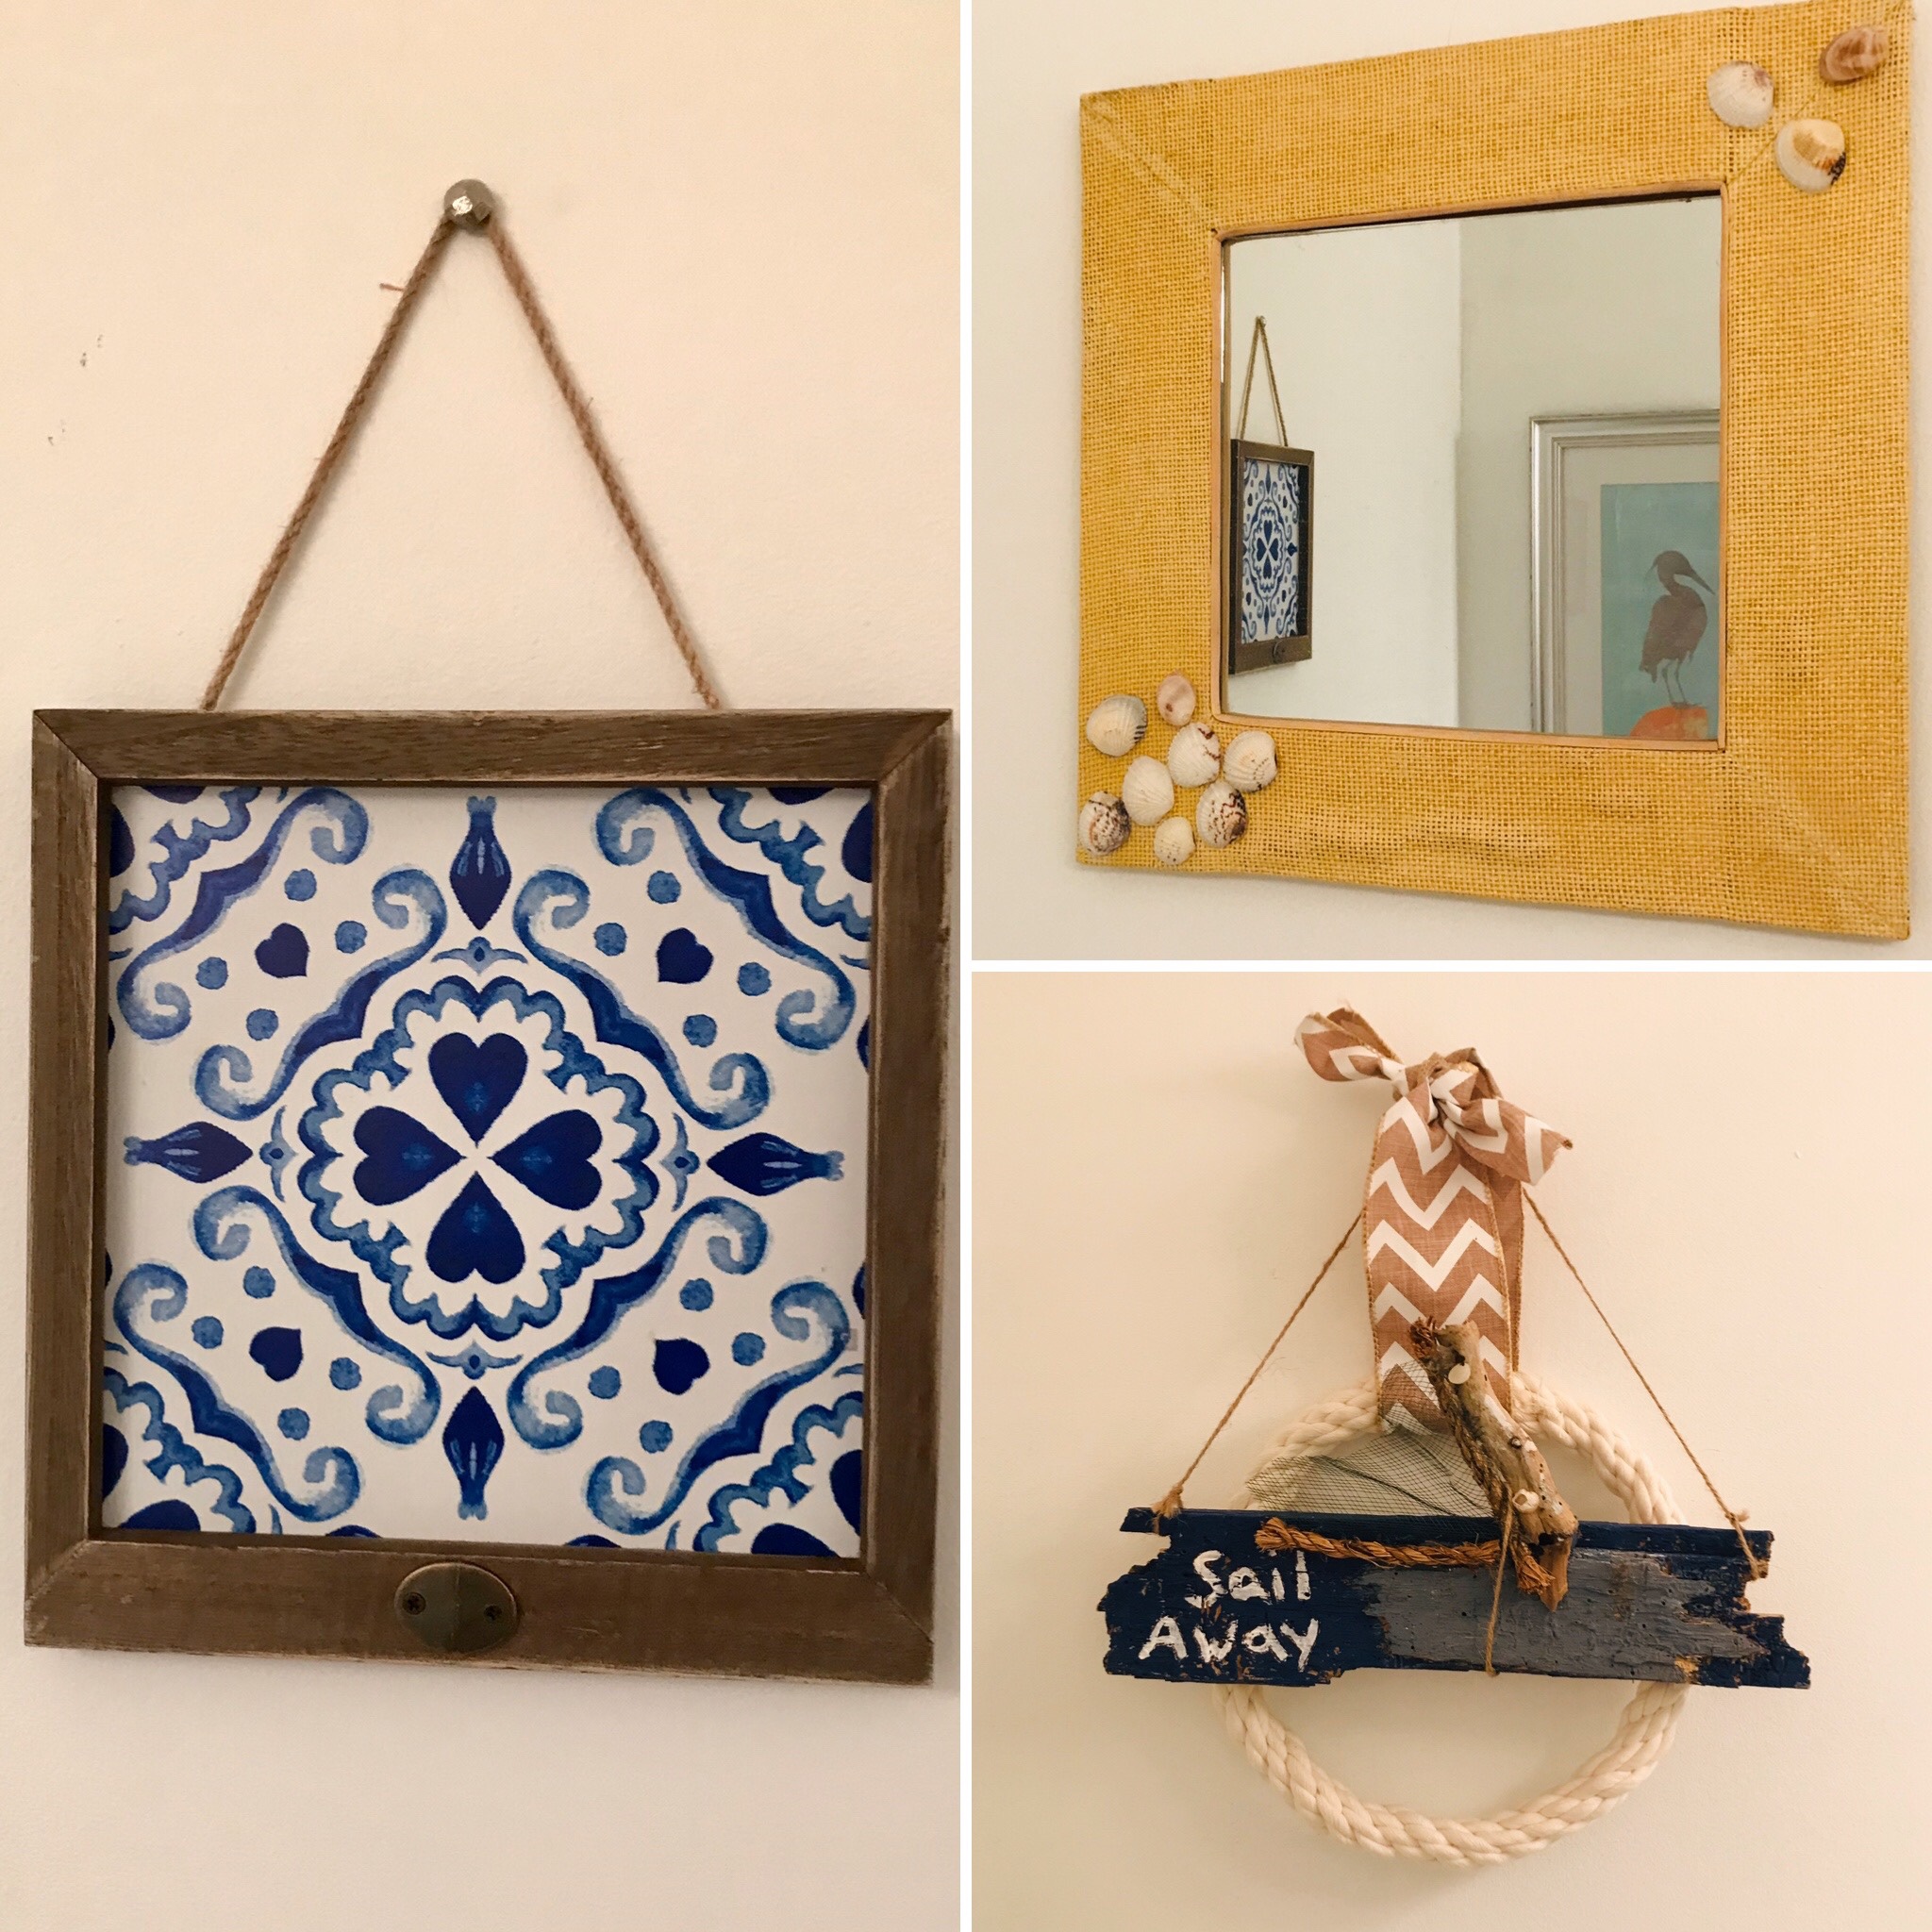
I switched up home decor I already owned to replace the original bathroom pictures and decorations. The above ☝️ photo of wall hangings fit nicely with the new color scheme and cottage feel of the bathroom to create the perfect accents.
Overall I am thrilled with the weekend project that gave our old bathroom a completely new and fresh feel. It was #costeffective and the total cost of the #renovation was under $100!
– Alison Paul Klakowicz
Host and Creator of Hodge Podge Podcast and Blog
Author of the Award-Winning Children’s Picture Book Mommy’s Big, Red Monster Truck
https://www.amazon.com/Mommys-Big-Red-Monster-Truck/dp/1525530178
http://www.alisonpaulklakowicz.com
Alison Paul Klakowicz is an Eastern North Carolina native, children’s book author, blogger, podcaster and creative writer. She is a military spouse who resides in Fayetteville, NC with her husband, Adam, and son, Mak.


1 thought on “DIY Half Bath Refurbish on a #Budget”